

How To Edit Live Photos On Iphone 6s
Live Photos is an iPhone camera feature that brings movement in your photos to life! Instead of freezing a moment in time with a still photo, a Live Photo captures a 3-second moving image. You can even create stunning long exposure images with Live Photos. Read on to discover how to use Live Photos to create unforgettable living memories with your iPhone.
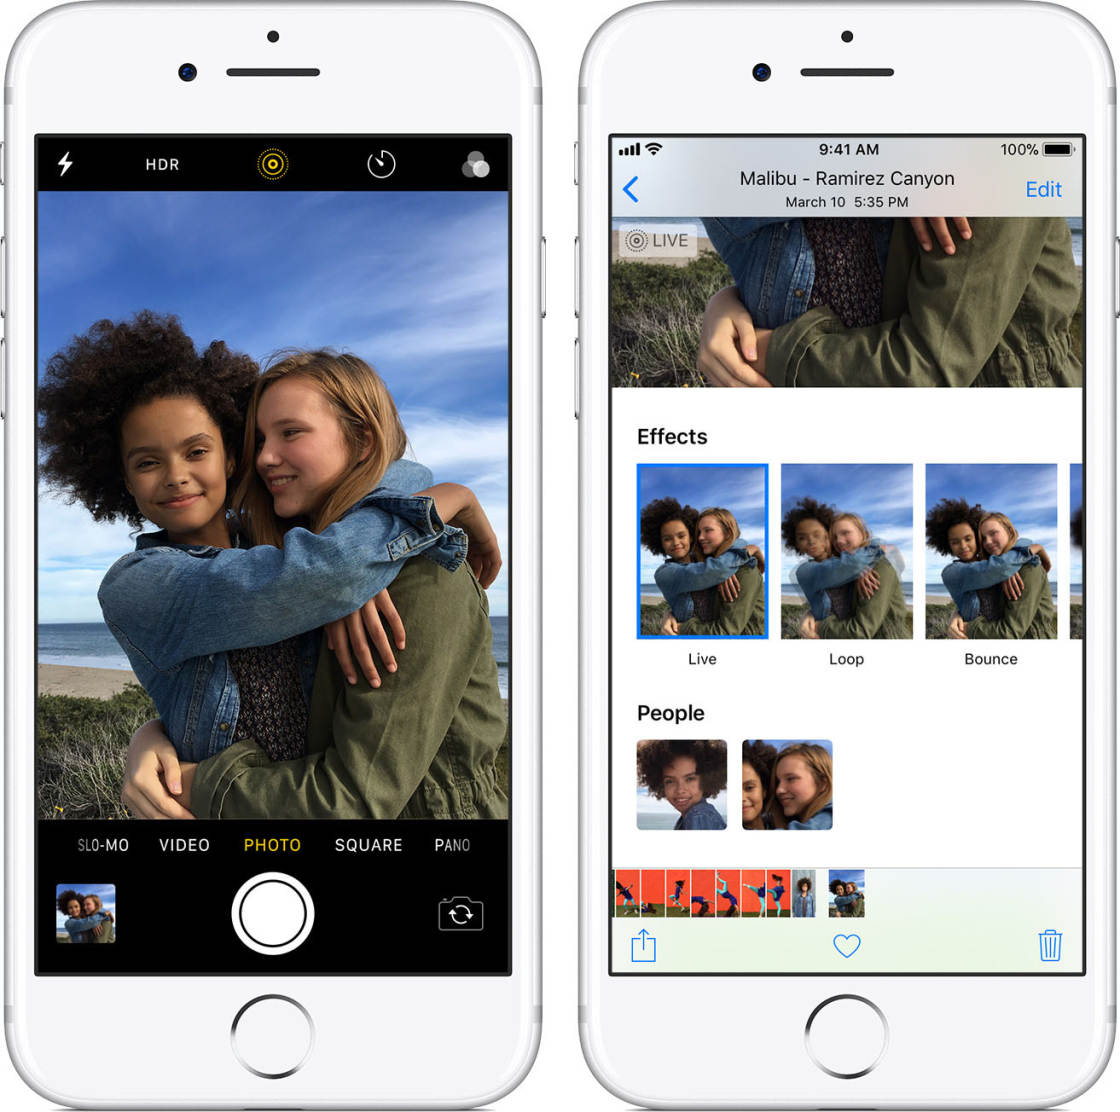
Table Of Contents: iPhone Live Photos
Click any title link below to go straight to that section of the article:
1. How To Capture A Live Photo On iPhone
2. How To Play A Live Photo
3. How To Edit A Live Photo
4. How To Add Live Photo Effects
5. How To Share Live Photos
6. How To Upload Live Photos To Facebook & Instagram
7. When To Use iPhone Live Photos For The Best Results
1. How To Capture A Live Photo On iPhone
It easy to shoot a Live Photo with your iPhone!
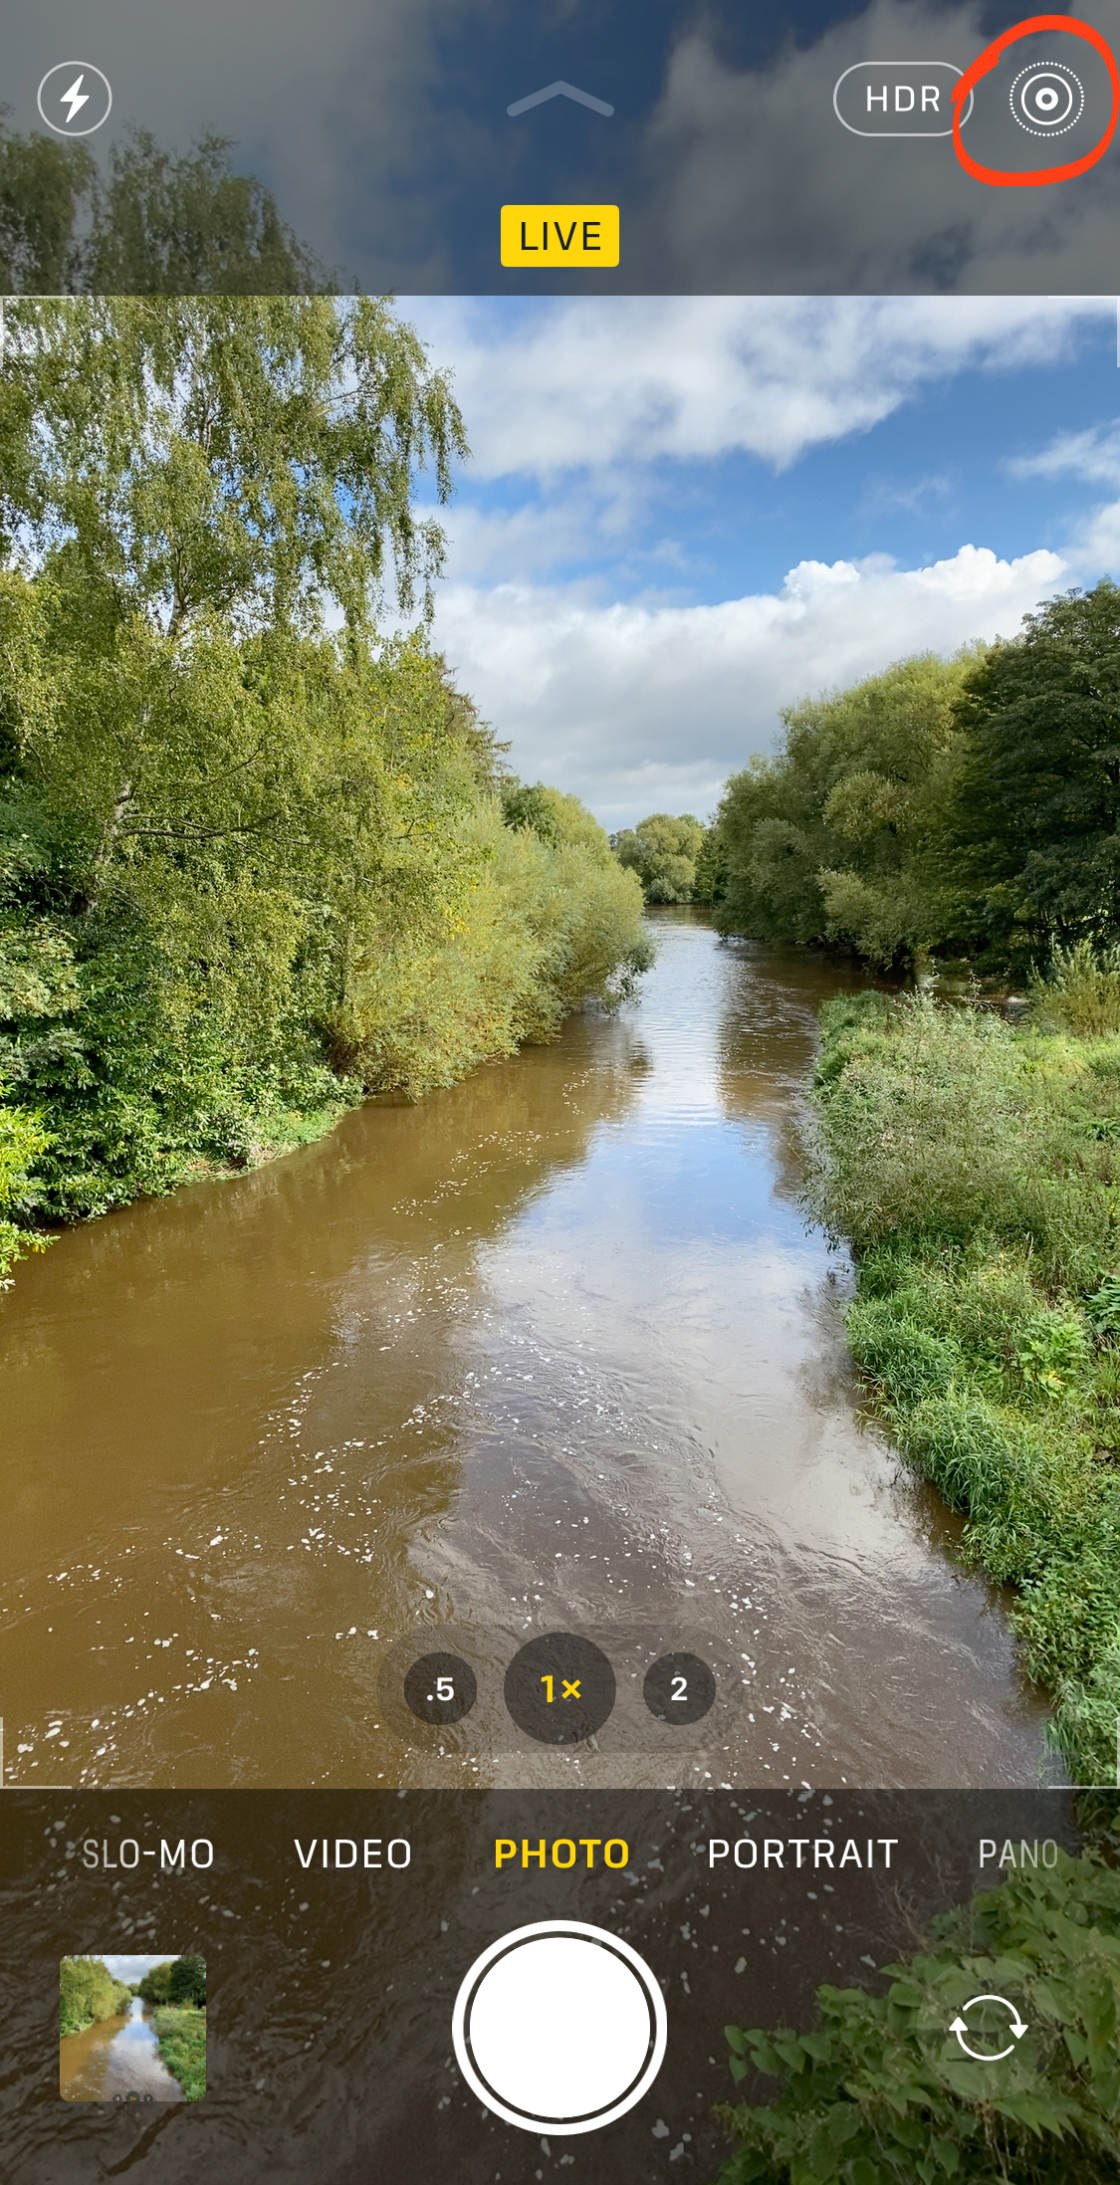
Simply open the built-in iPhone Camera app, and select Photo mode at the bottom of the screen.
The Live Photos icon (three circles) is at the top right of the screen. If it doesn't have a line through it, Live Photos is switched on. If the icon has a line through it, tap it to turn on Live Photos.
A Live Photo captures 3 seconds of movement and sound. 1.5 seconds of the Live Photo is captured before you press the shutter button, and 1.5 seconds is captured after.
Therefore, ensure you compose your shot and hold it there for a couple of seconds before you press the shutter. If you don't do this, the first part of your Live Photo will be of you moving the camera to frame the shot.
Likewise, your iPhone will record for 1.5 seconds after you've pressed the shutter. So make sure you keep your phone still for a couple of seconds after taking the shot.
Also, be aware that Live Photos capture audio as well as video. So you'll hear any sound in your Live Photo when you play it back.
Below is a 3-second Live Photo of people on the beach. Hit the Play button to view it:
If you're taking an action shot of a person, you might need to tell your subject to move when you take the photo.
Do this at least a couple of seconds before you press the shutter so that you don't capture your voice in the Live Photo.
When you no longer want to shoot Live Photos, tap the Live Photos icon at the top of the Camera app to switch it off.
Live Photos take up a lot of storage space on your iPhone. So if you leave it on for every shot, you may find that your phone quickly becomes full.
2. How To Play A Live Photo
After taking a Live Photo, it appears in the Photos app alongside your ordinary still images. You'll also find it in a separate album titled Live Photos.
Unfortunately, in thumbnail view, there's no way of knowing whether an image is a Live Photo.
In the screenshot below, there are several Live Photos amongst these images. But it's impossible to tell which ones they are when viewing them like this.
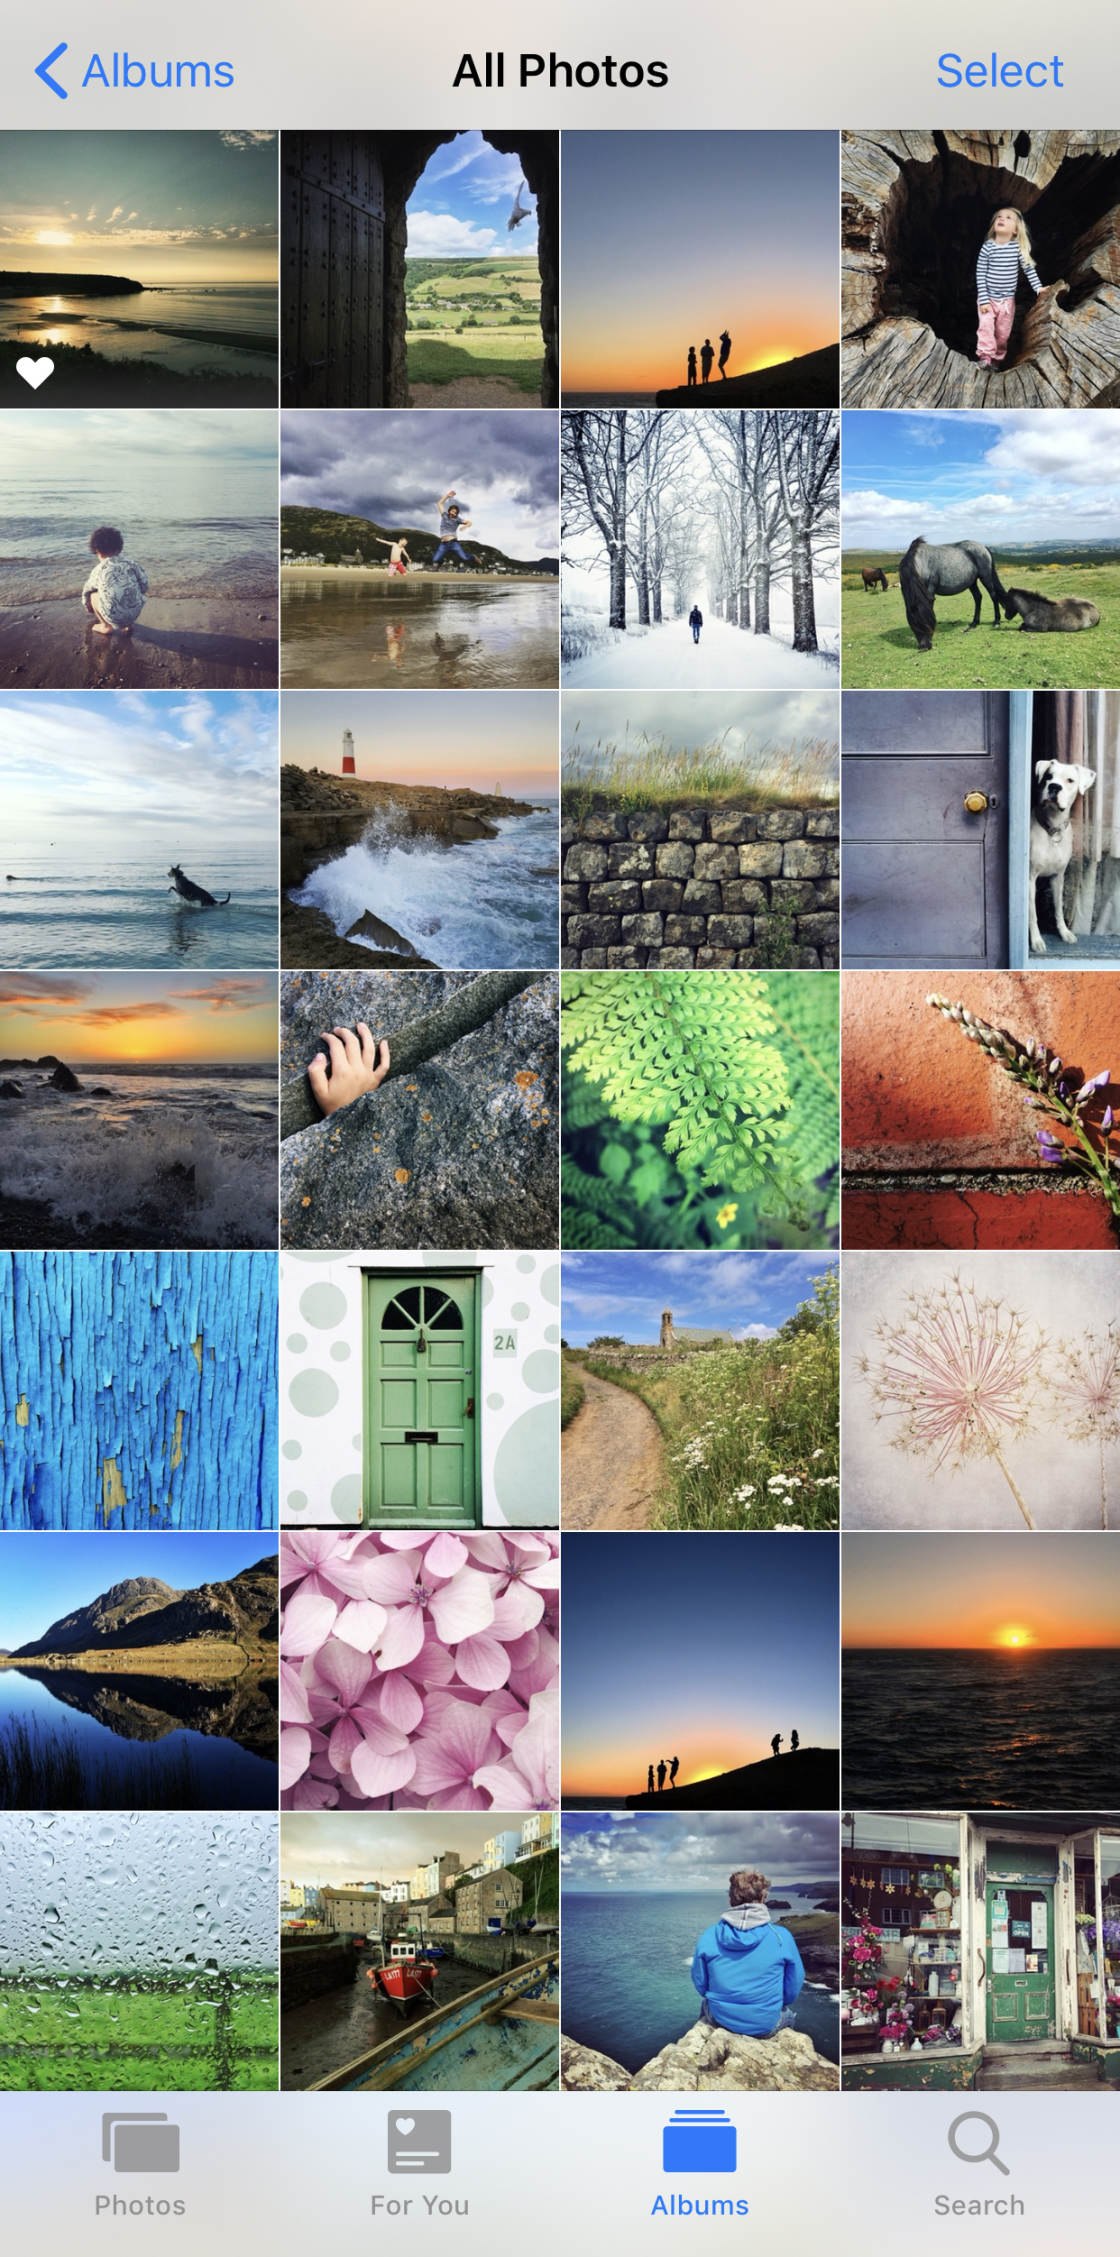
So how do you know which of your images are Live Photos?
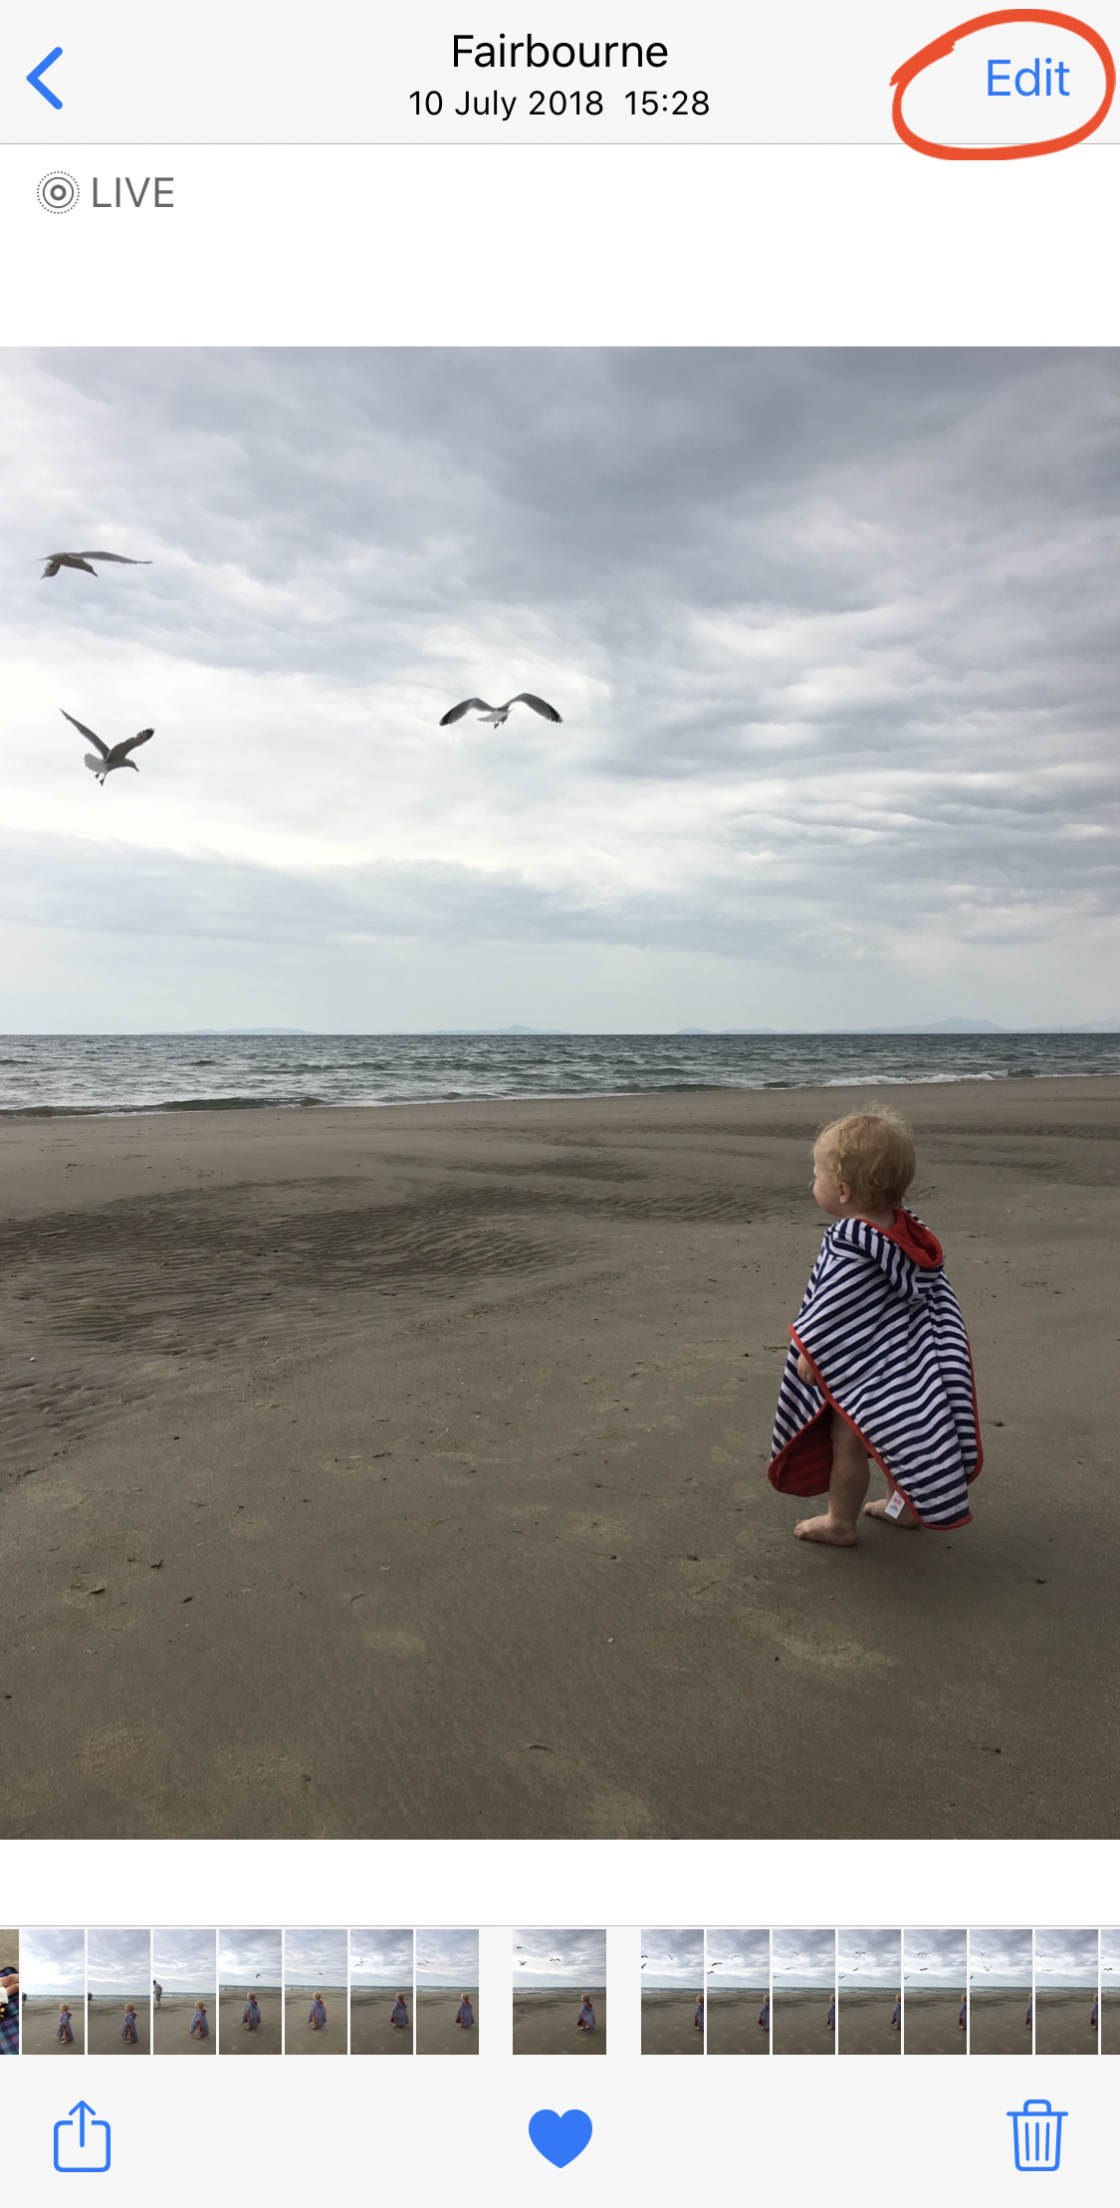
Tap on the image thumbnail so it opens in full screen. If it's a Live Photo, you'll see the word LIVE at the top of the photo.
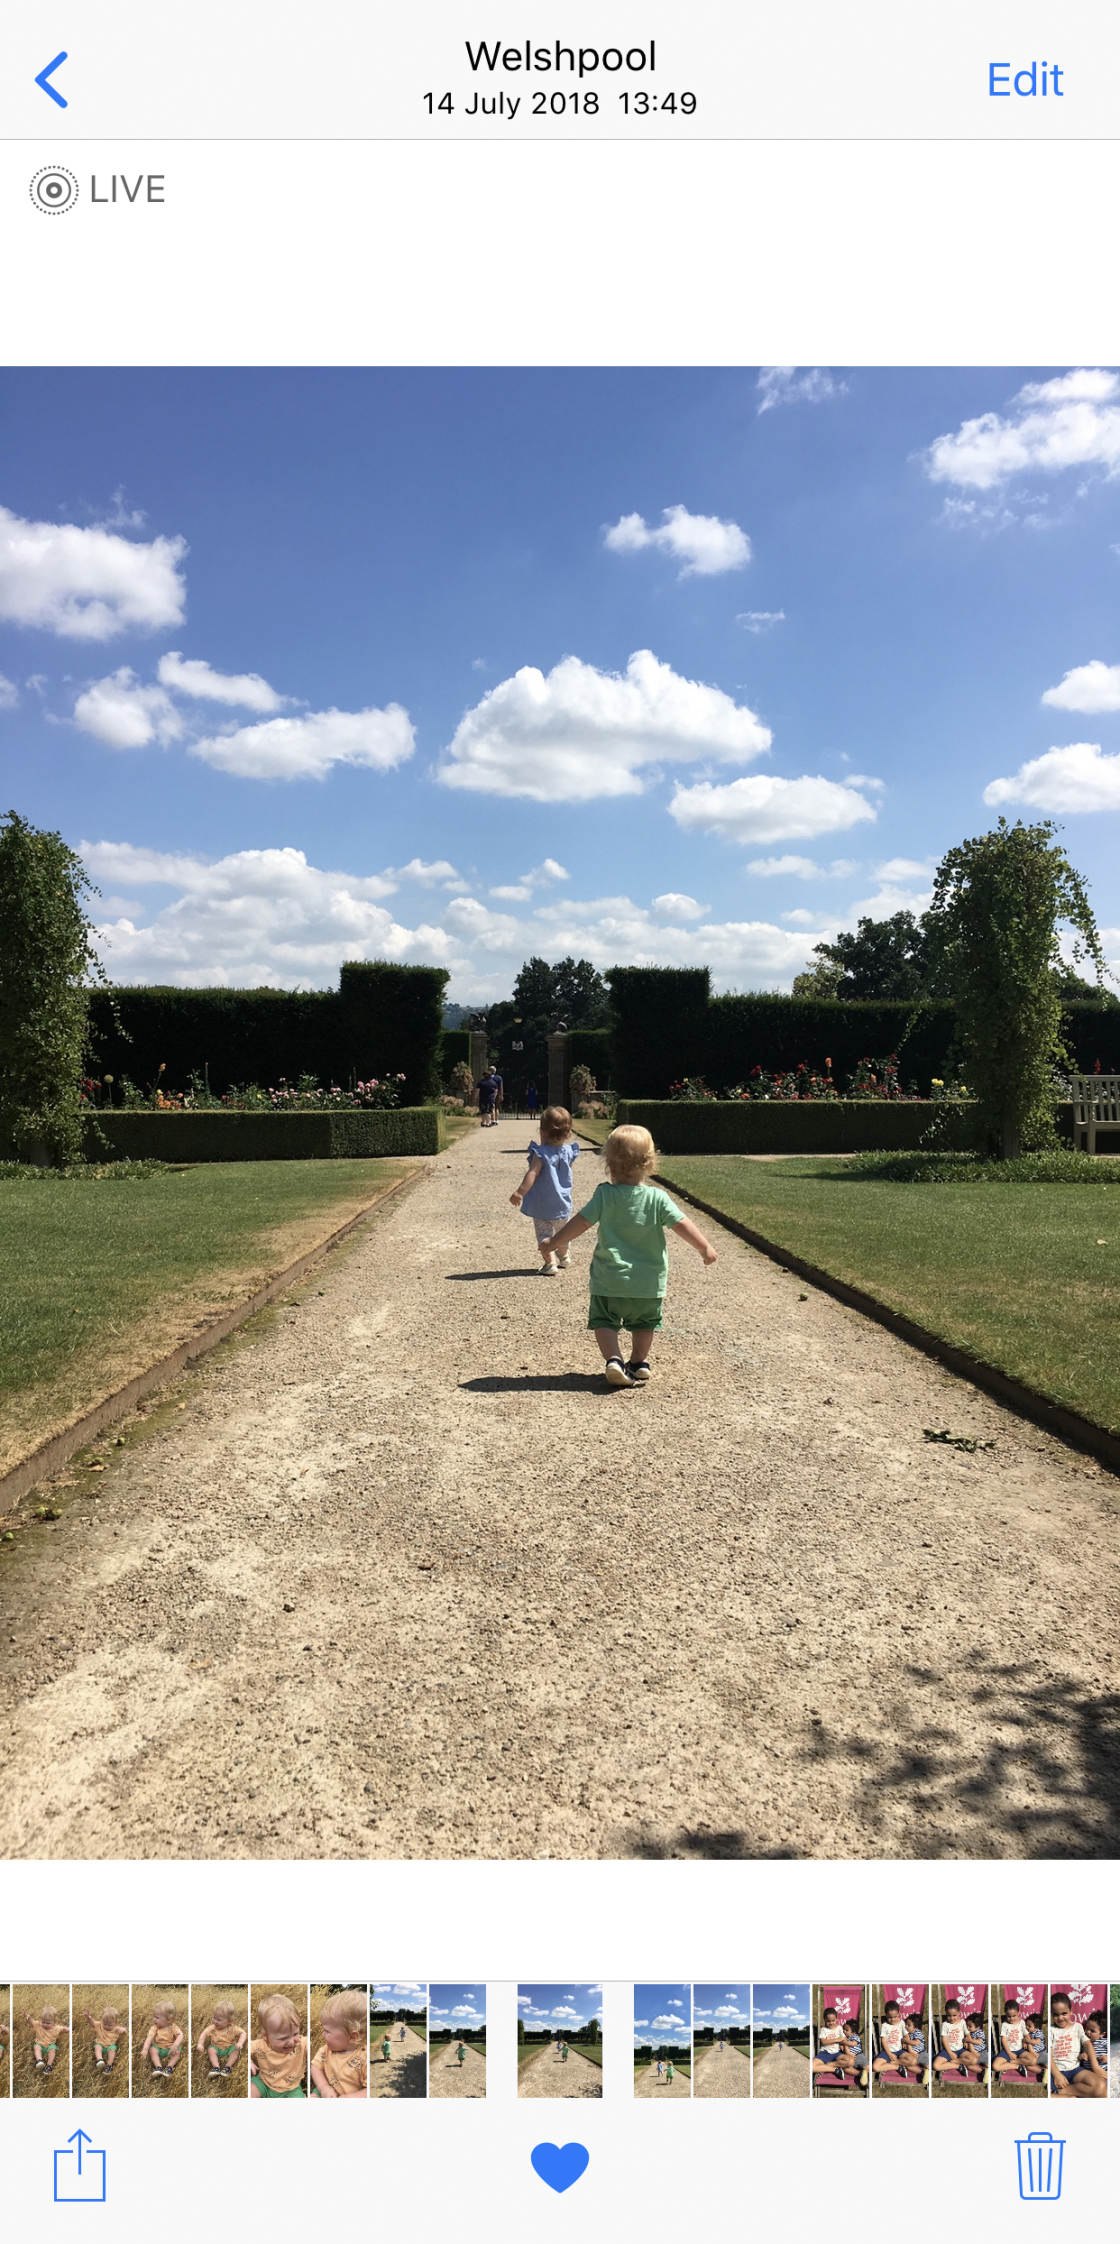
To view the Live Photo animation, hold your finger down on the photo. As soon as you remove it, the video will stop playing.
3. How To Edit A Live Photo
Editing Live Photos in the Photos app is similar to editing still images. But for Live Photos, there are some extra editing tools.
When you open a Live Photo, tap Edit at the top right of the screen.
The editing tools appear at the bottom of the screen.
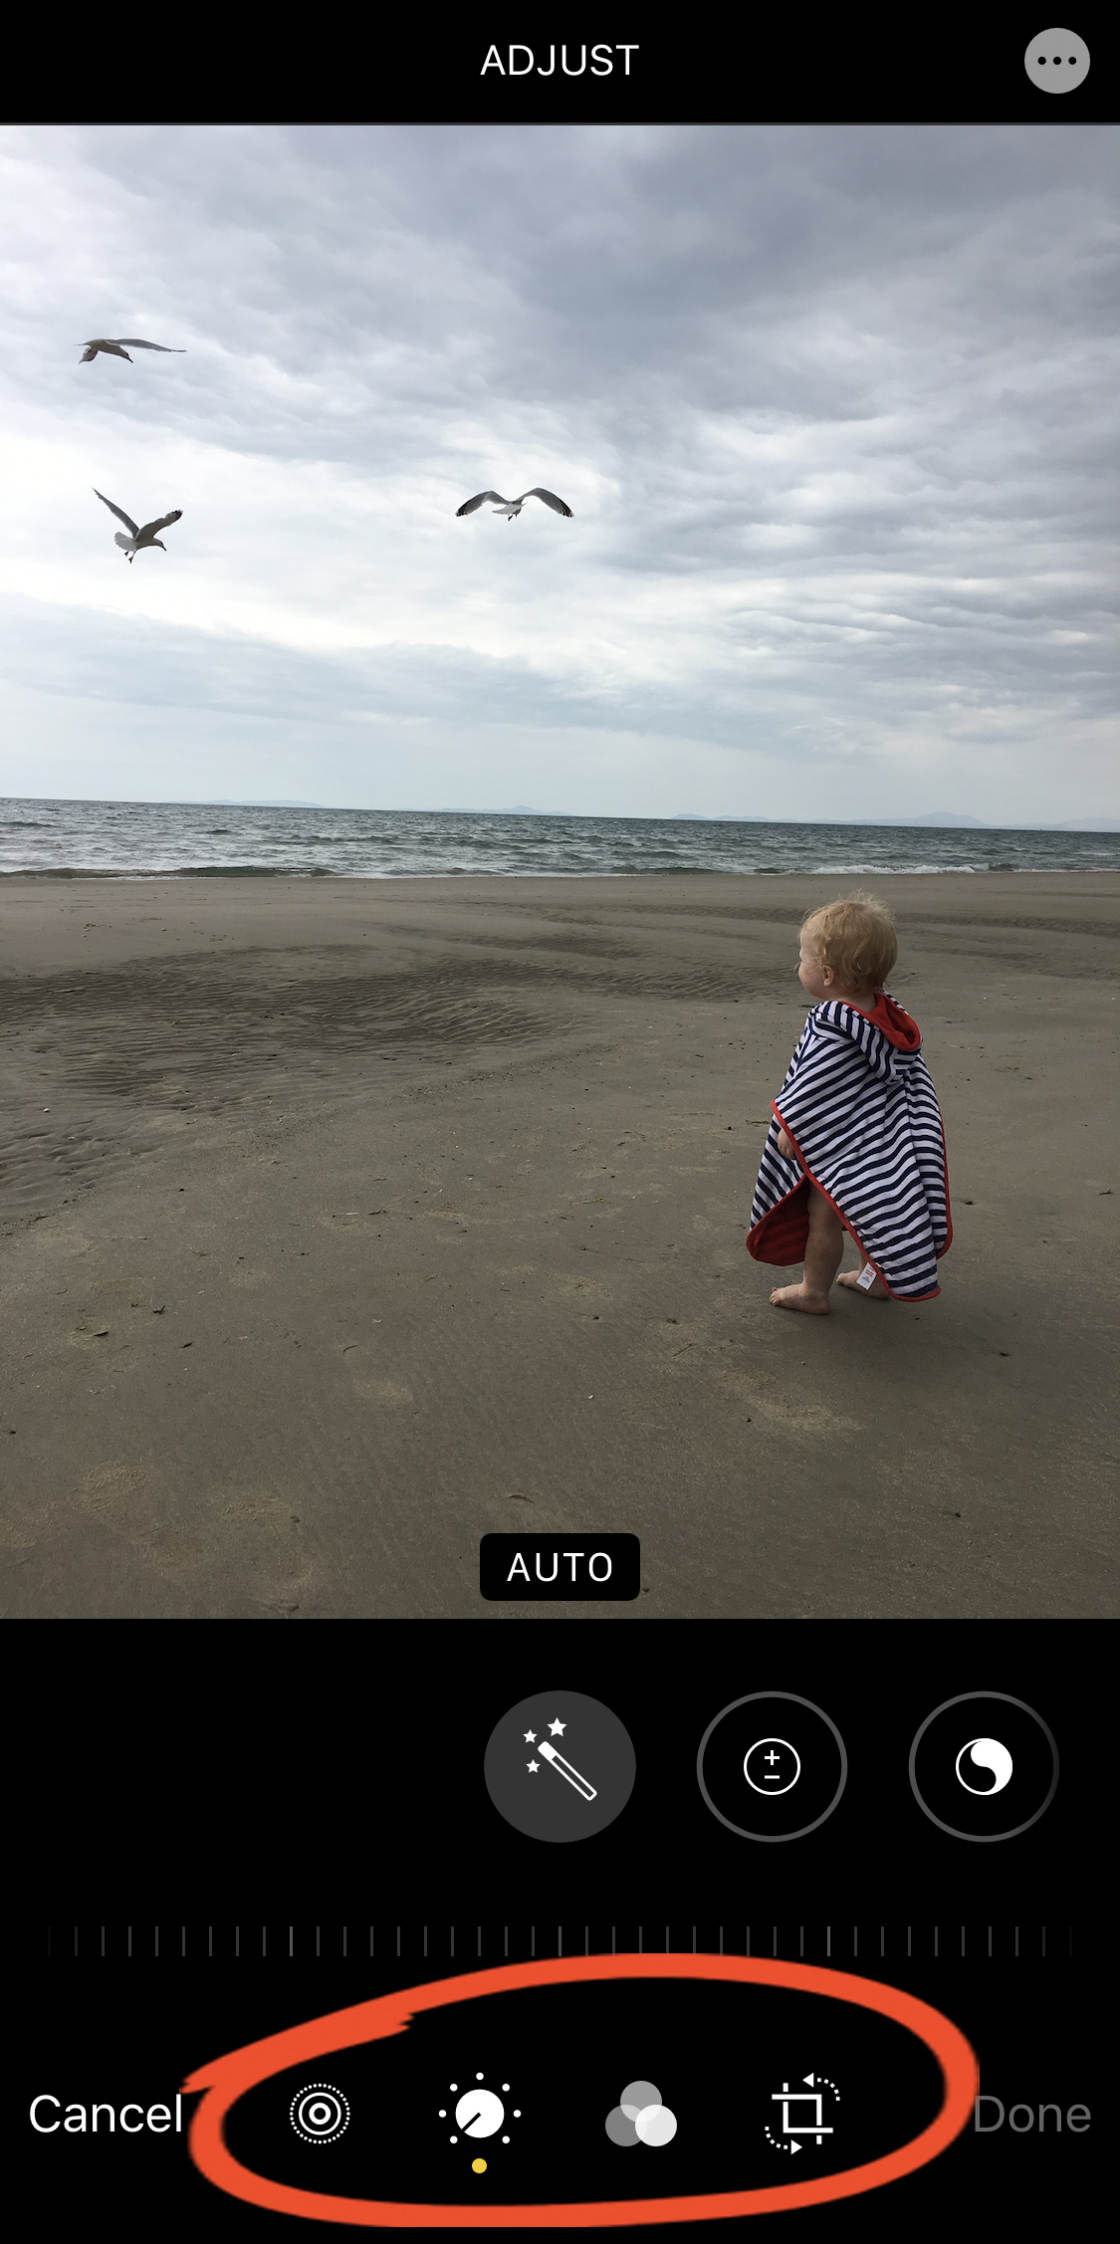
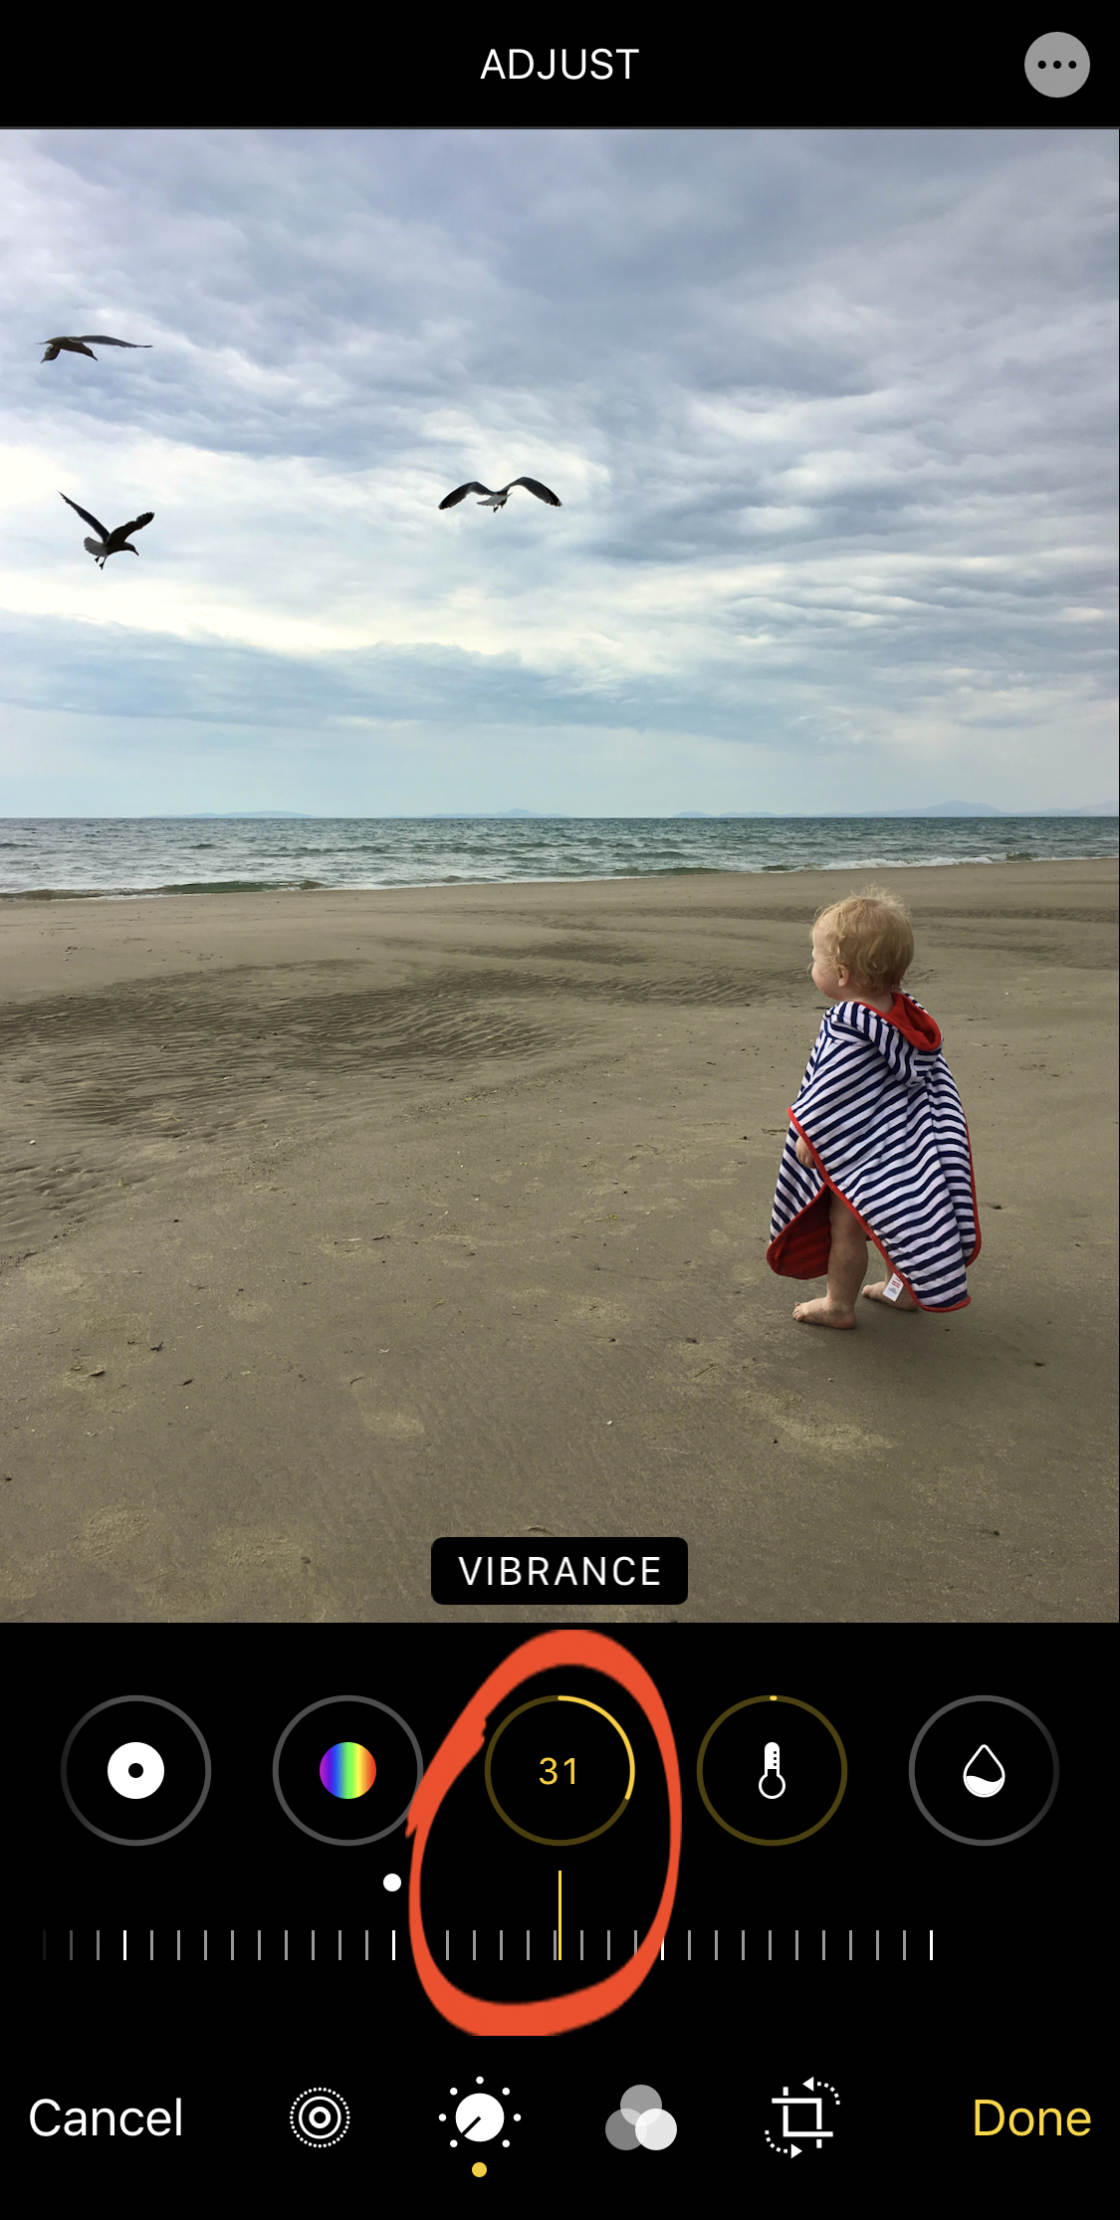
TheAdjust icon lets you adjust color, exposure, and sharpness using a range of tools.
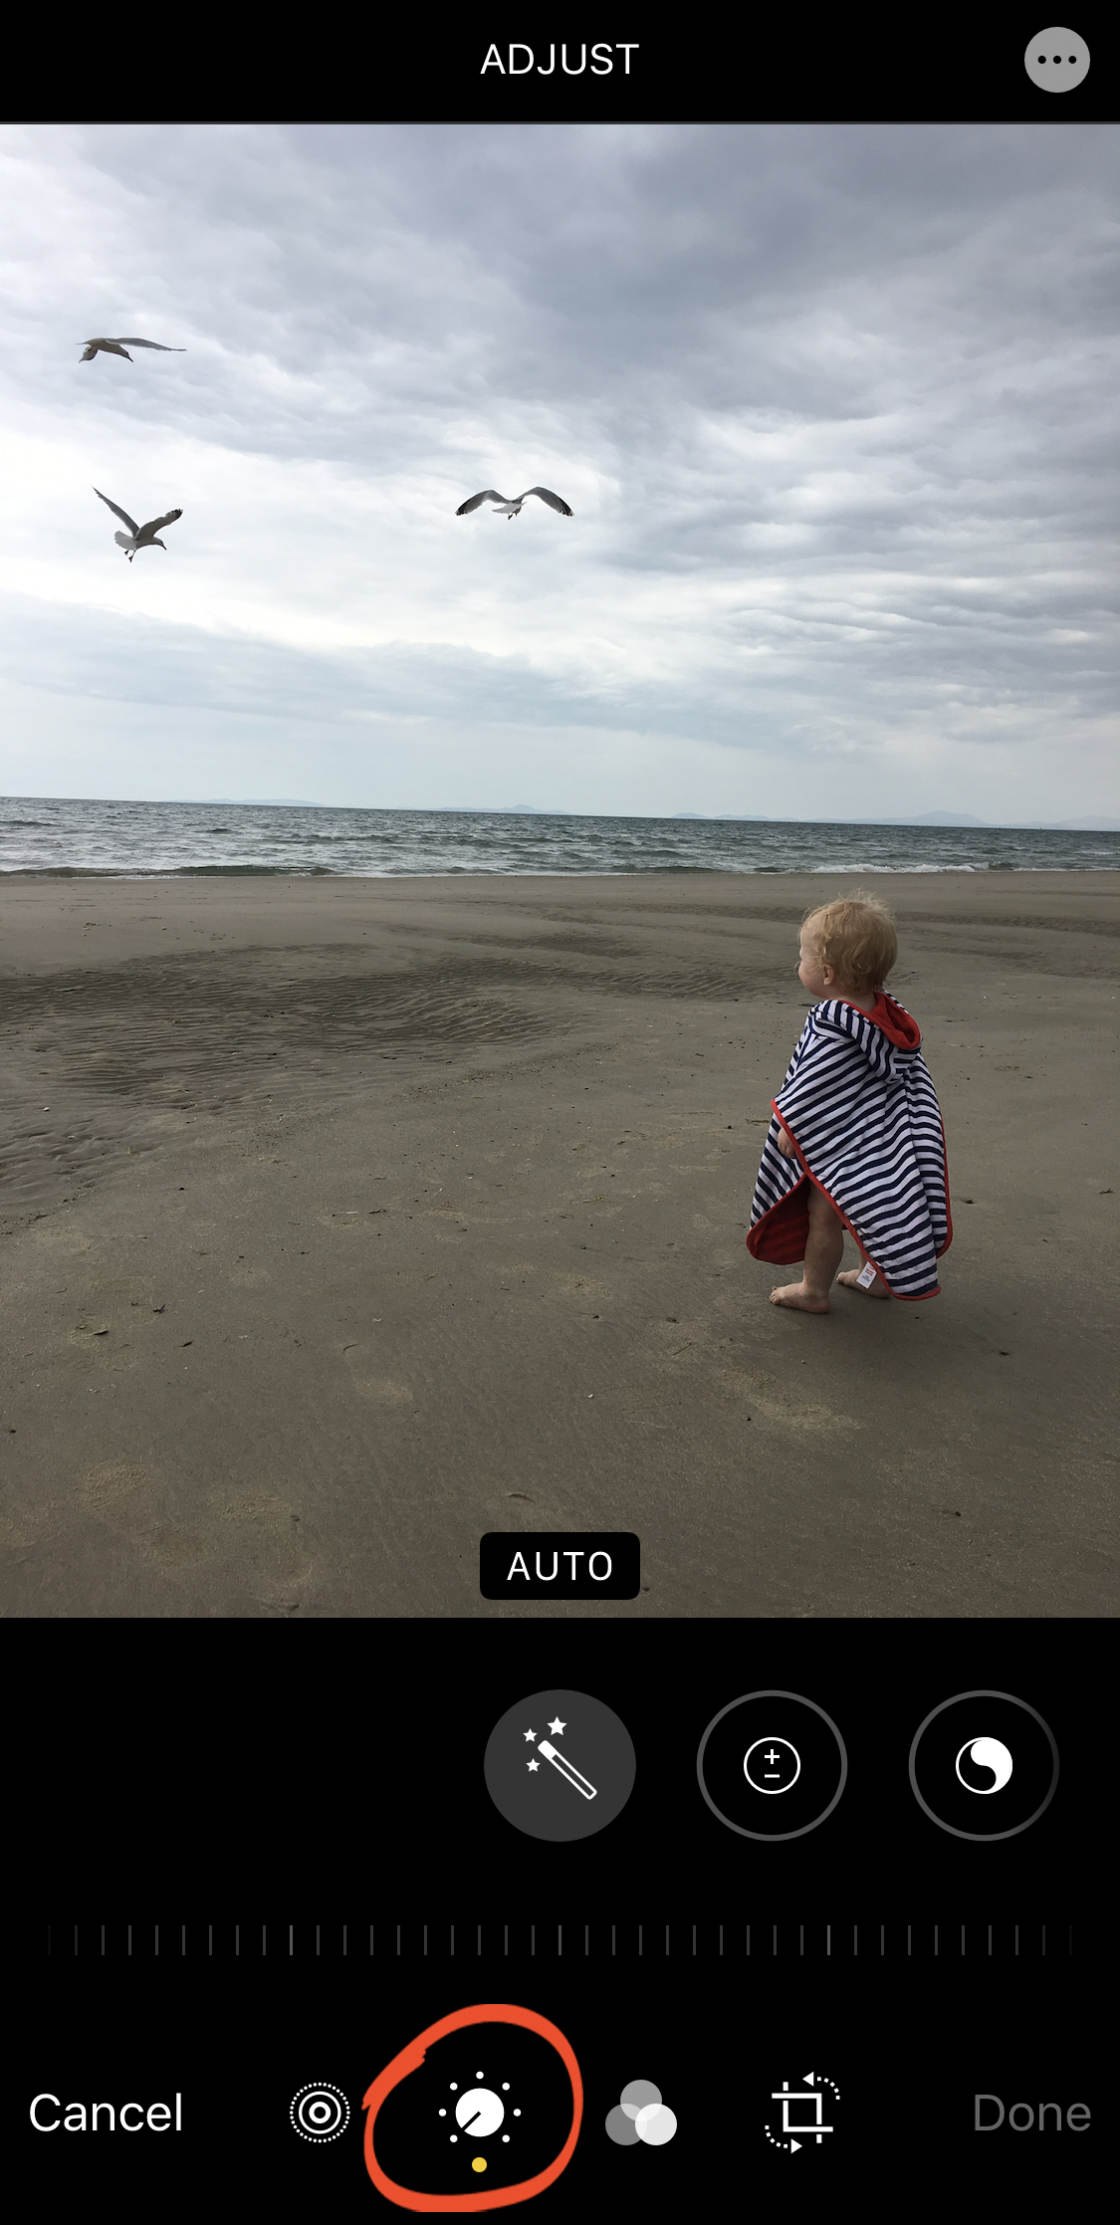
Swipe across the adjustment tools beneath the photo and select the one you want to use. Then drag the slider to make the adjustment.
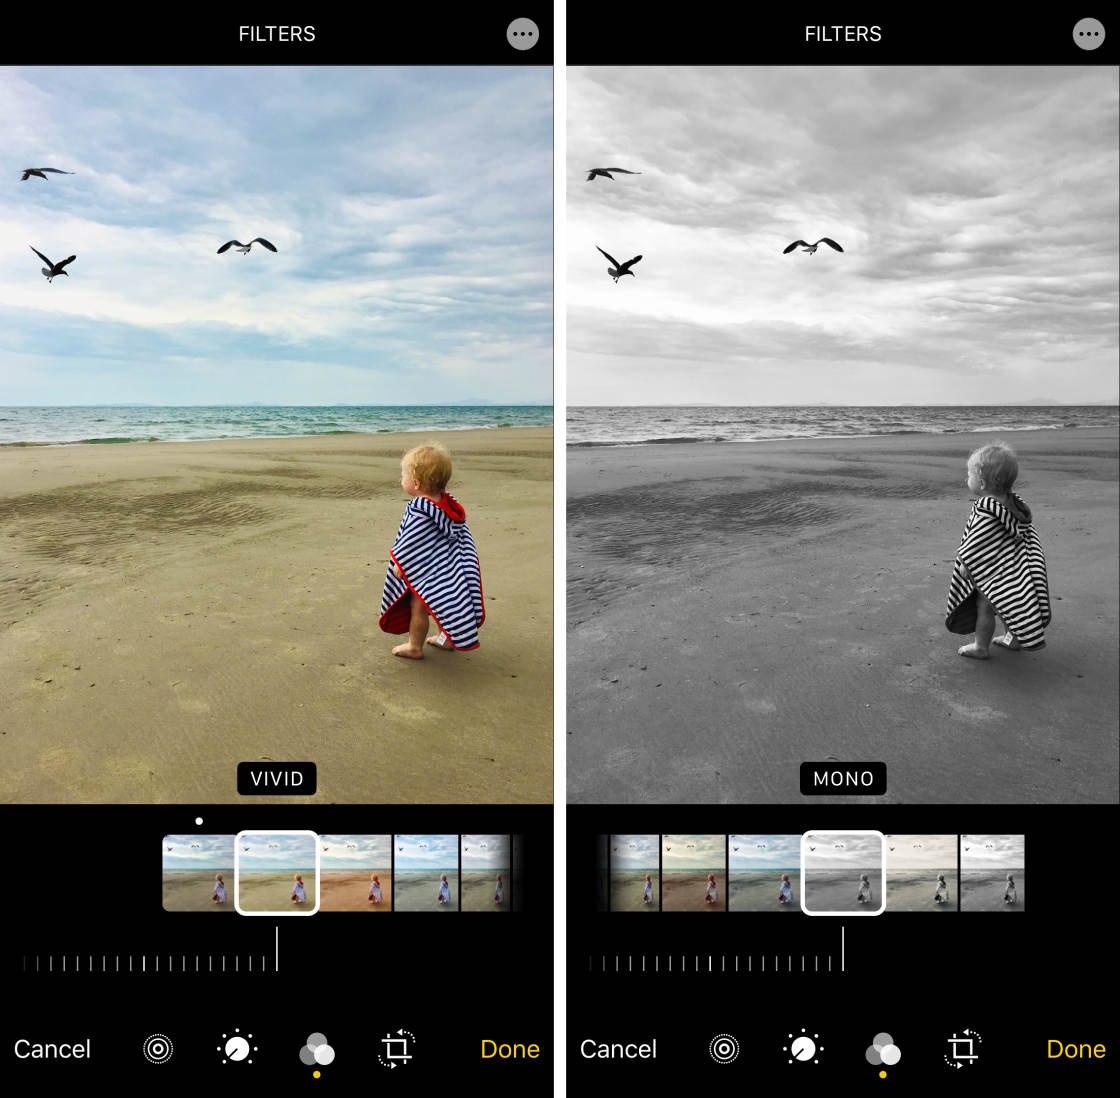
To apply a color or black and white filter, tap the Filters icon.
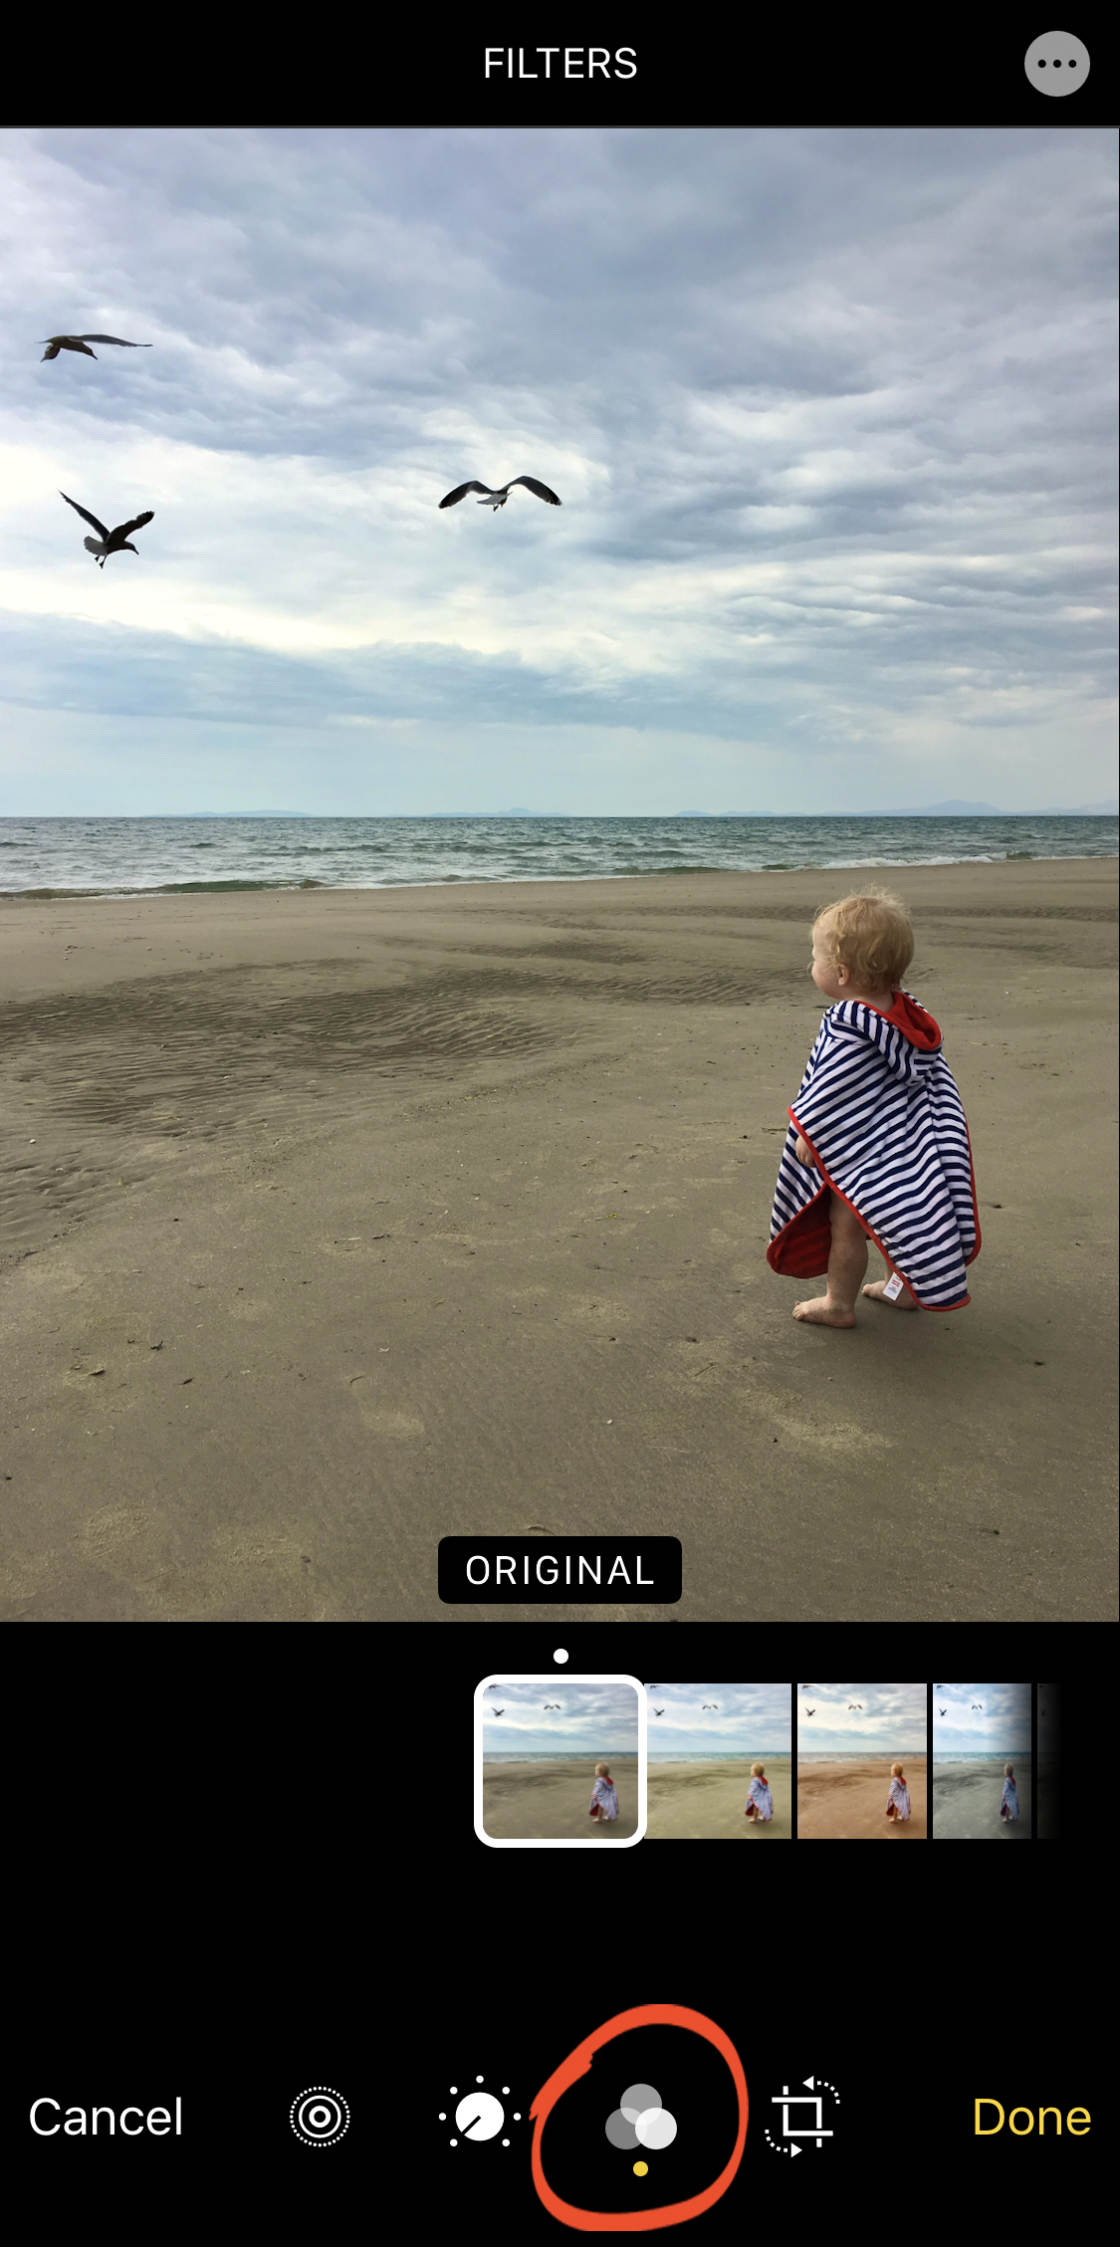
Swipe through the list of filters, then tap a filter to apply it to your image. Use the slider to adjust the filter strength.
To crop or rotate your Live Photo, tap the Crop icon.
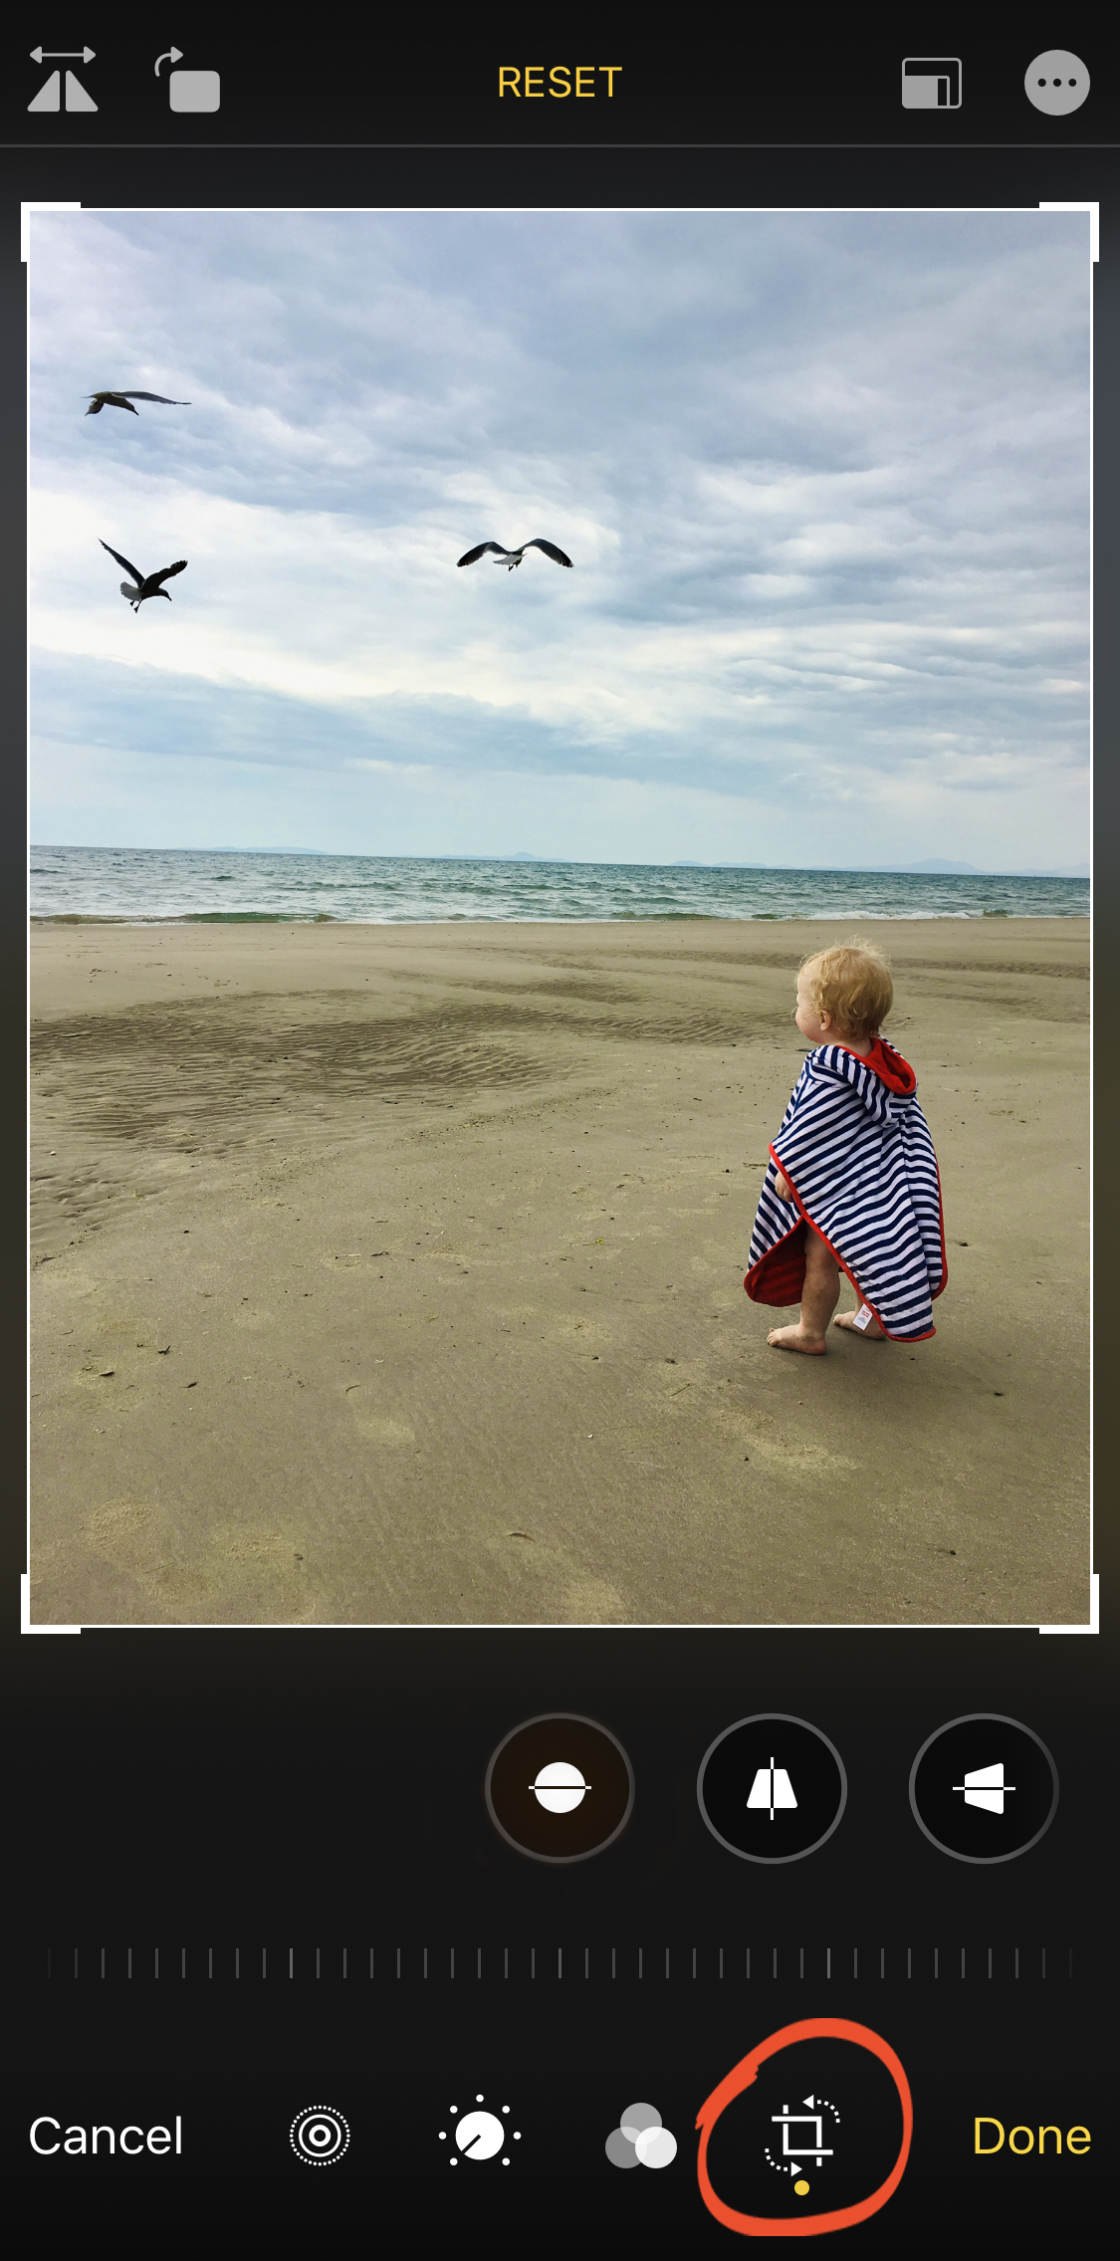
To straighten your image, tap the Straighten icon, then drag the slider left or right.
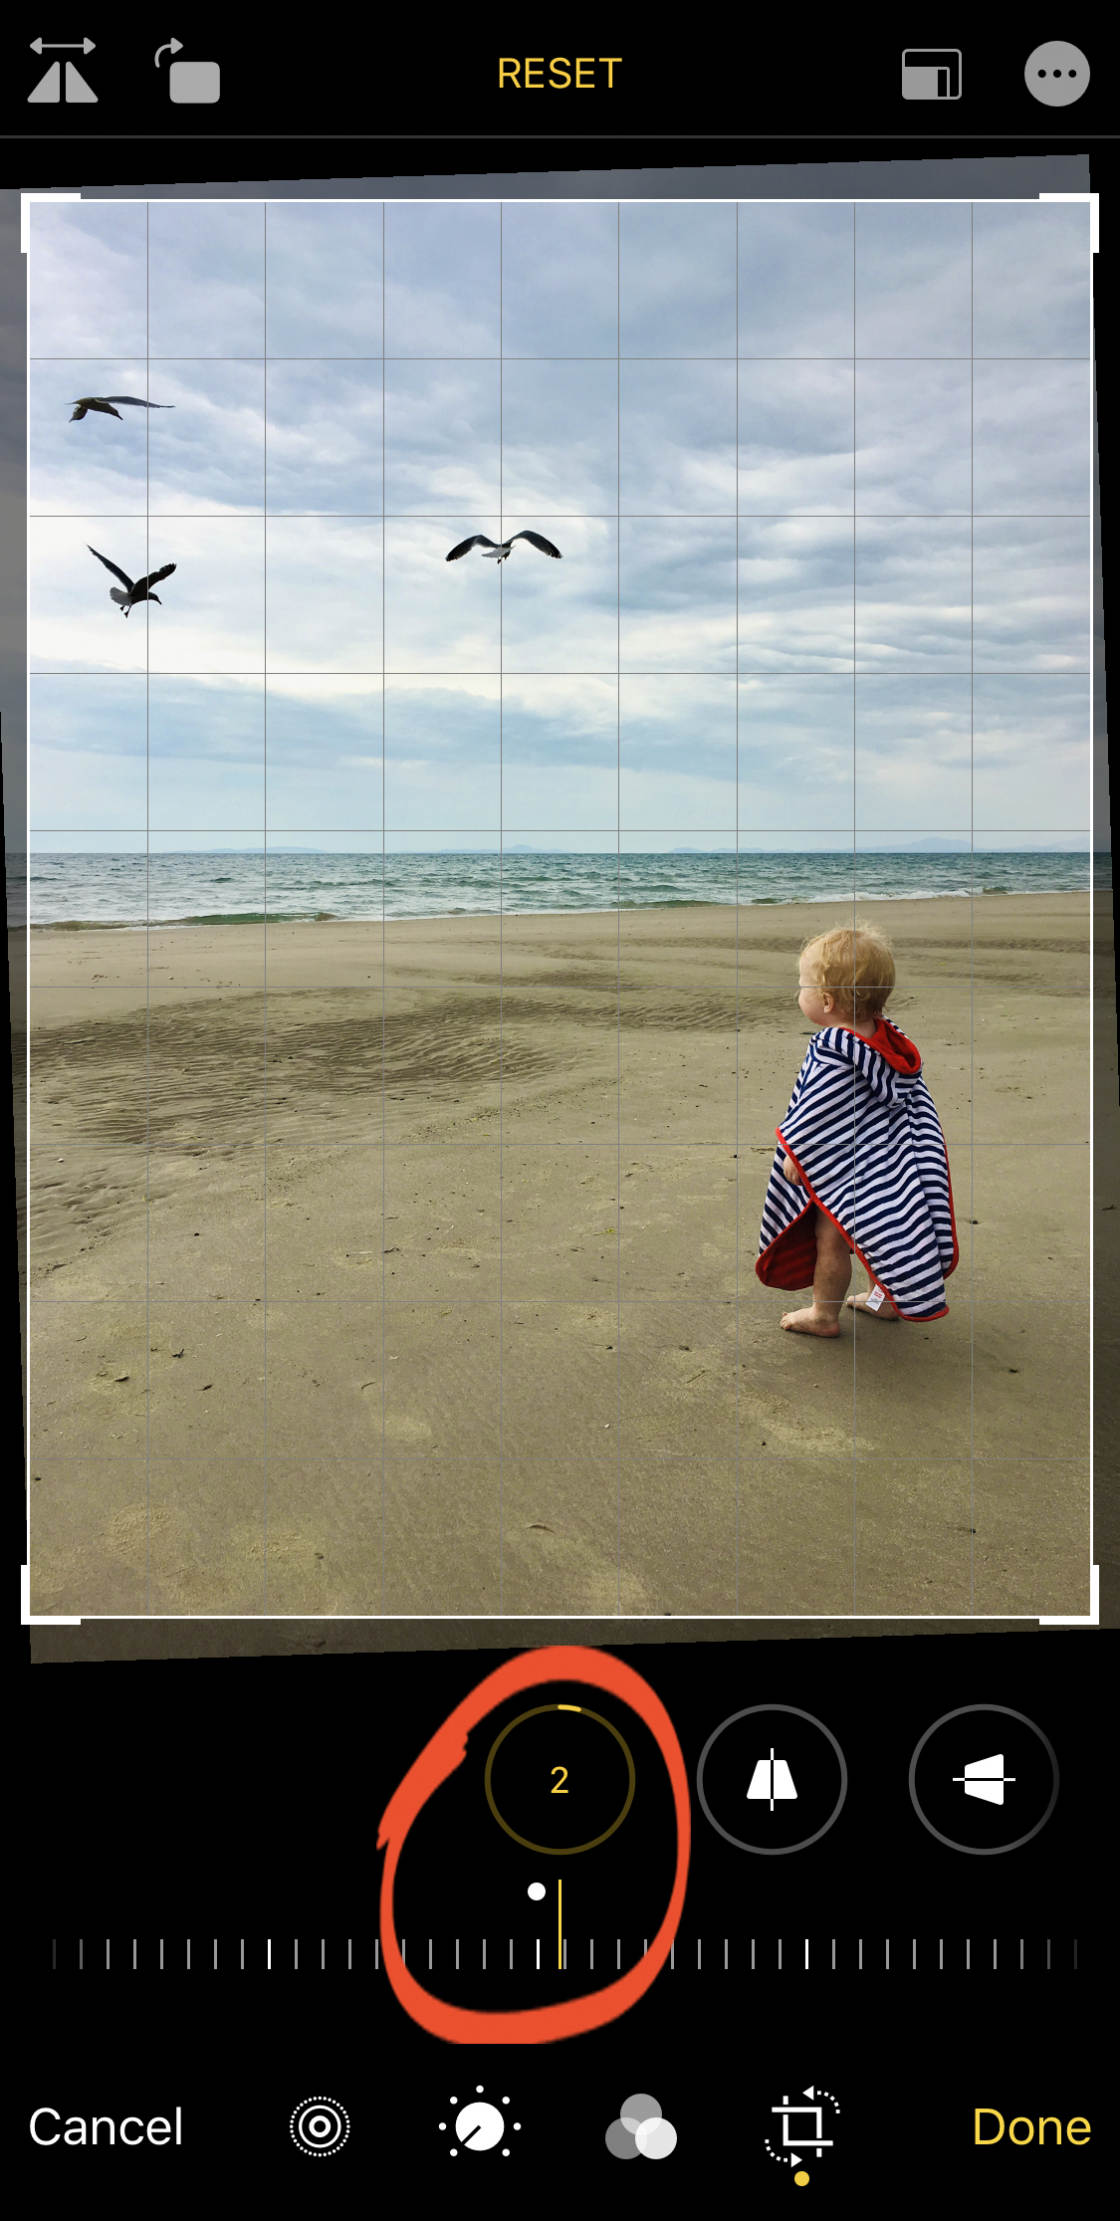
To crop your photo, drag the corner crop handles.
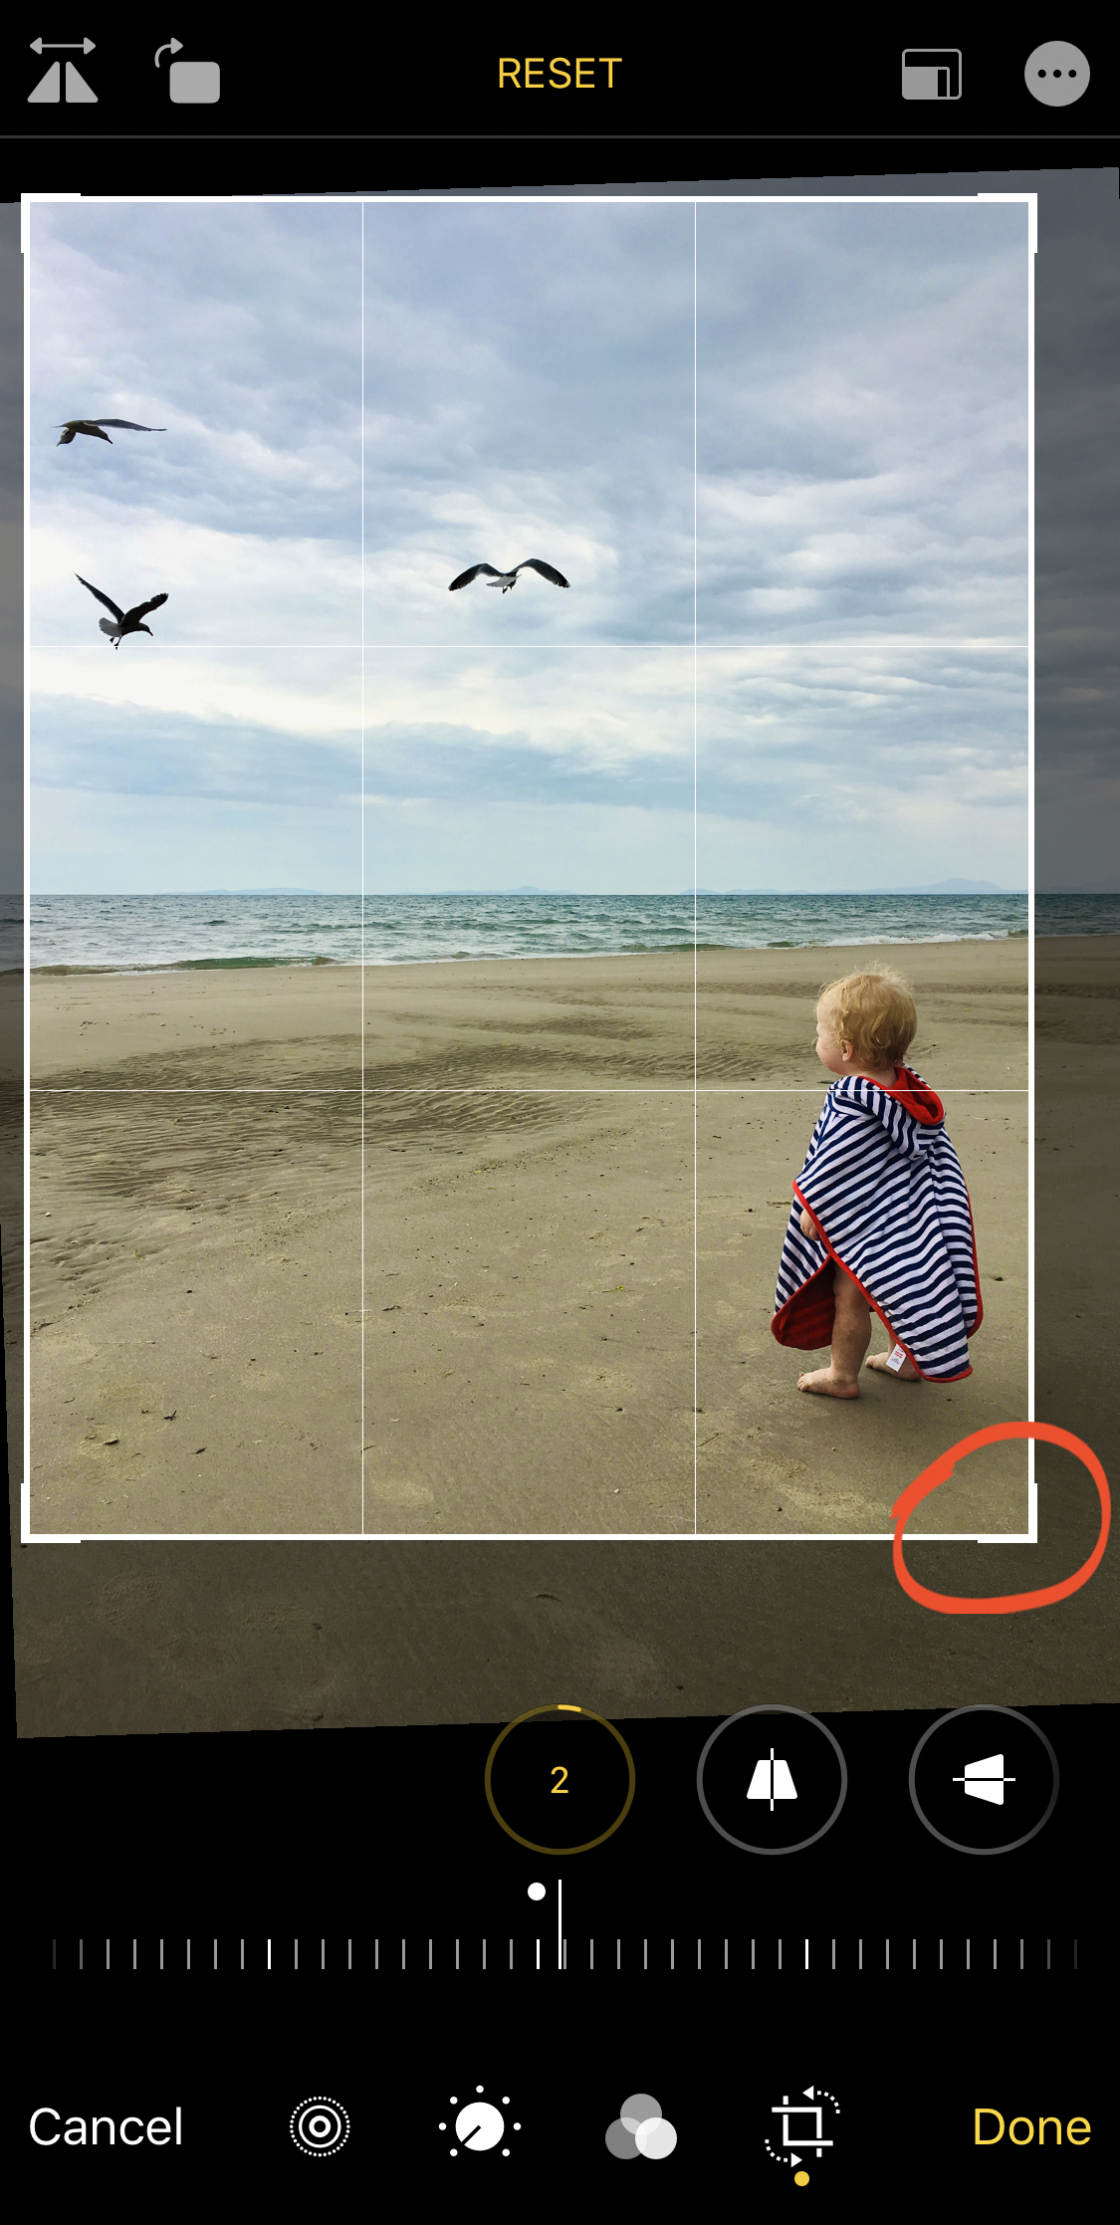
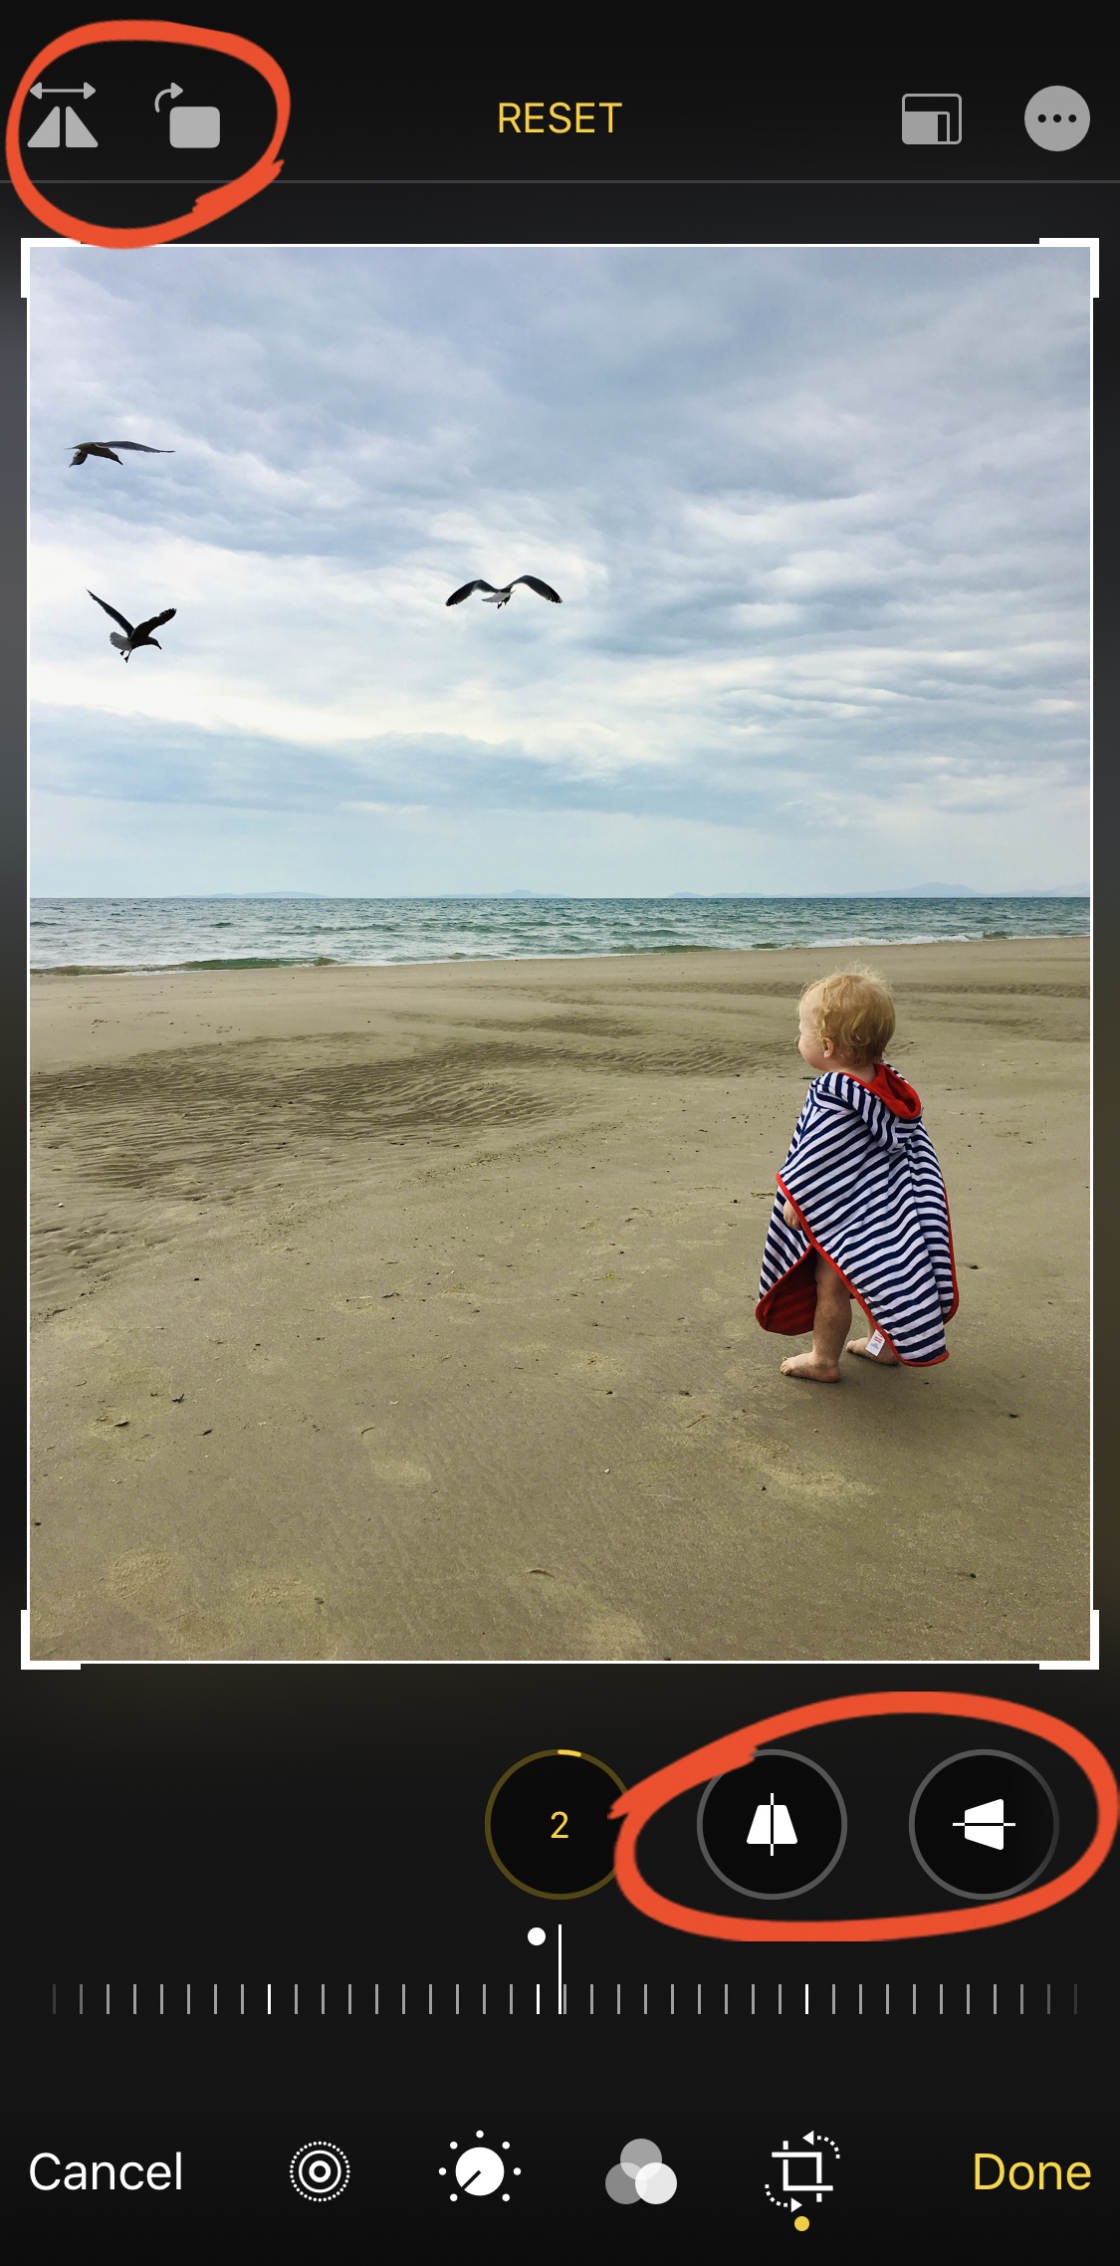
You can also rotate or flip the photo using the icons at the top left. You can adjust the vertical or horizontal perspective using the icons near the bottom right.
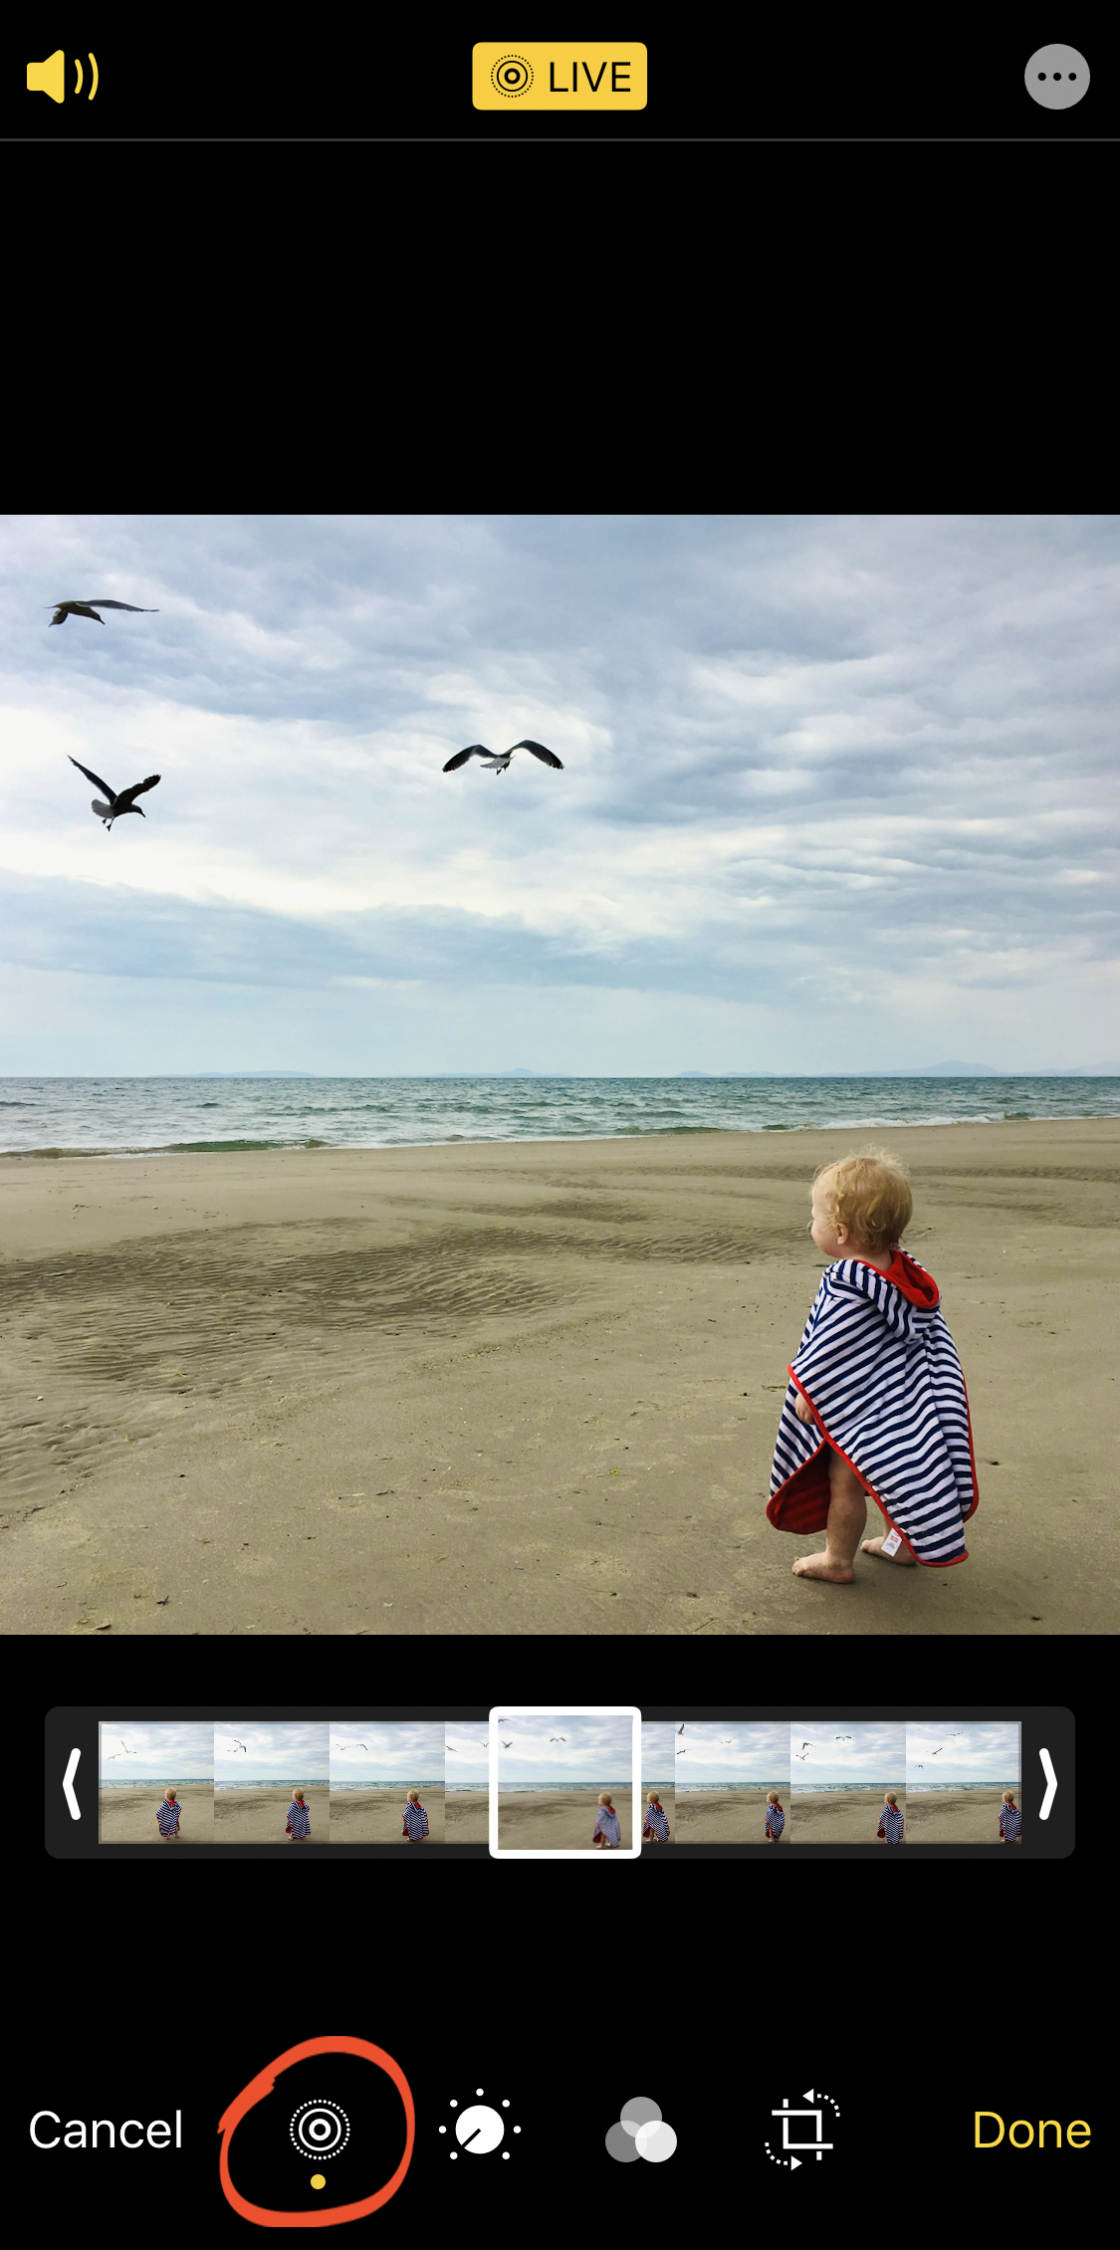
You can make further edits to the Live Photo by tapping the Live icon.
If the sound you recorded with the Live Photo is distracting, tap the Sound (speaker) icon to mute the audio.
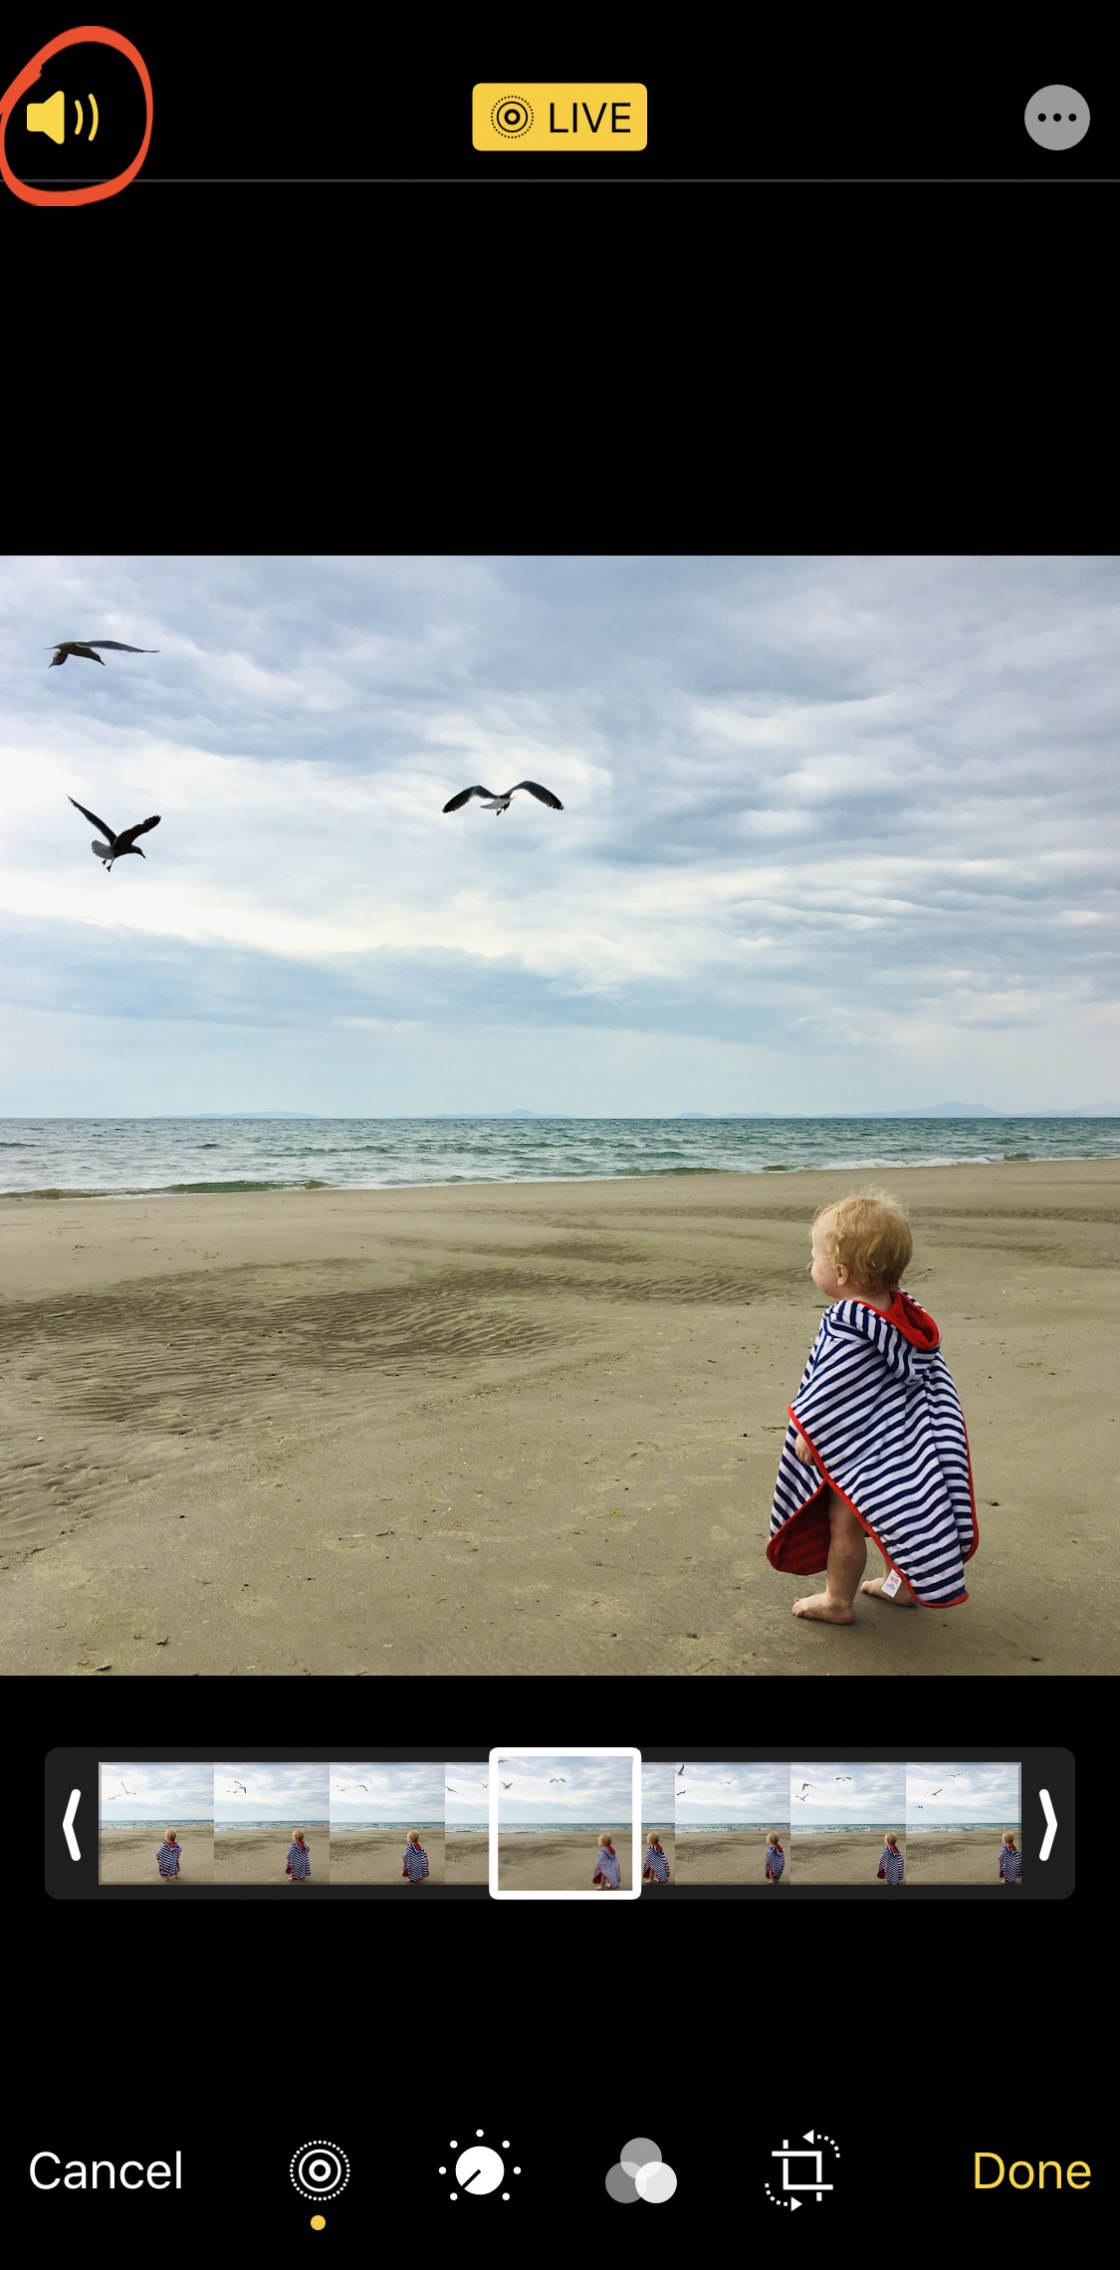
The Sound icon will turn grey to indicate that the sound is switched off.
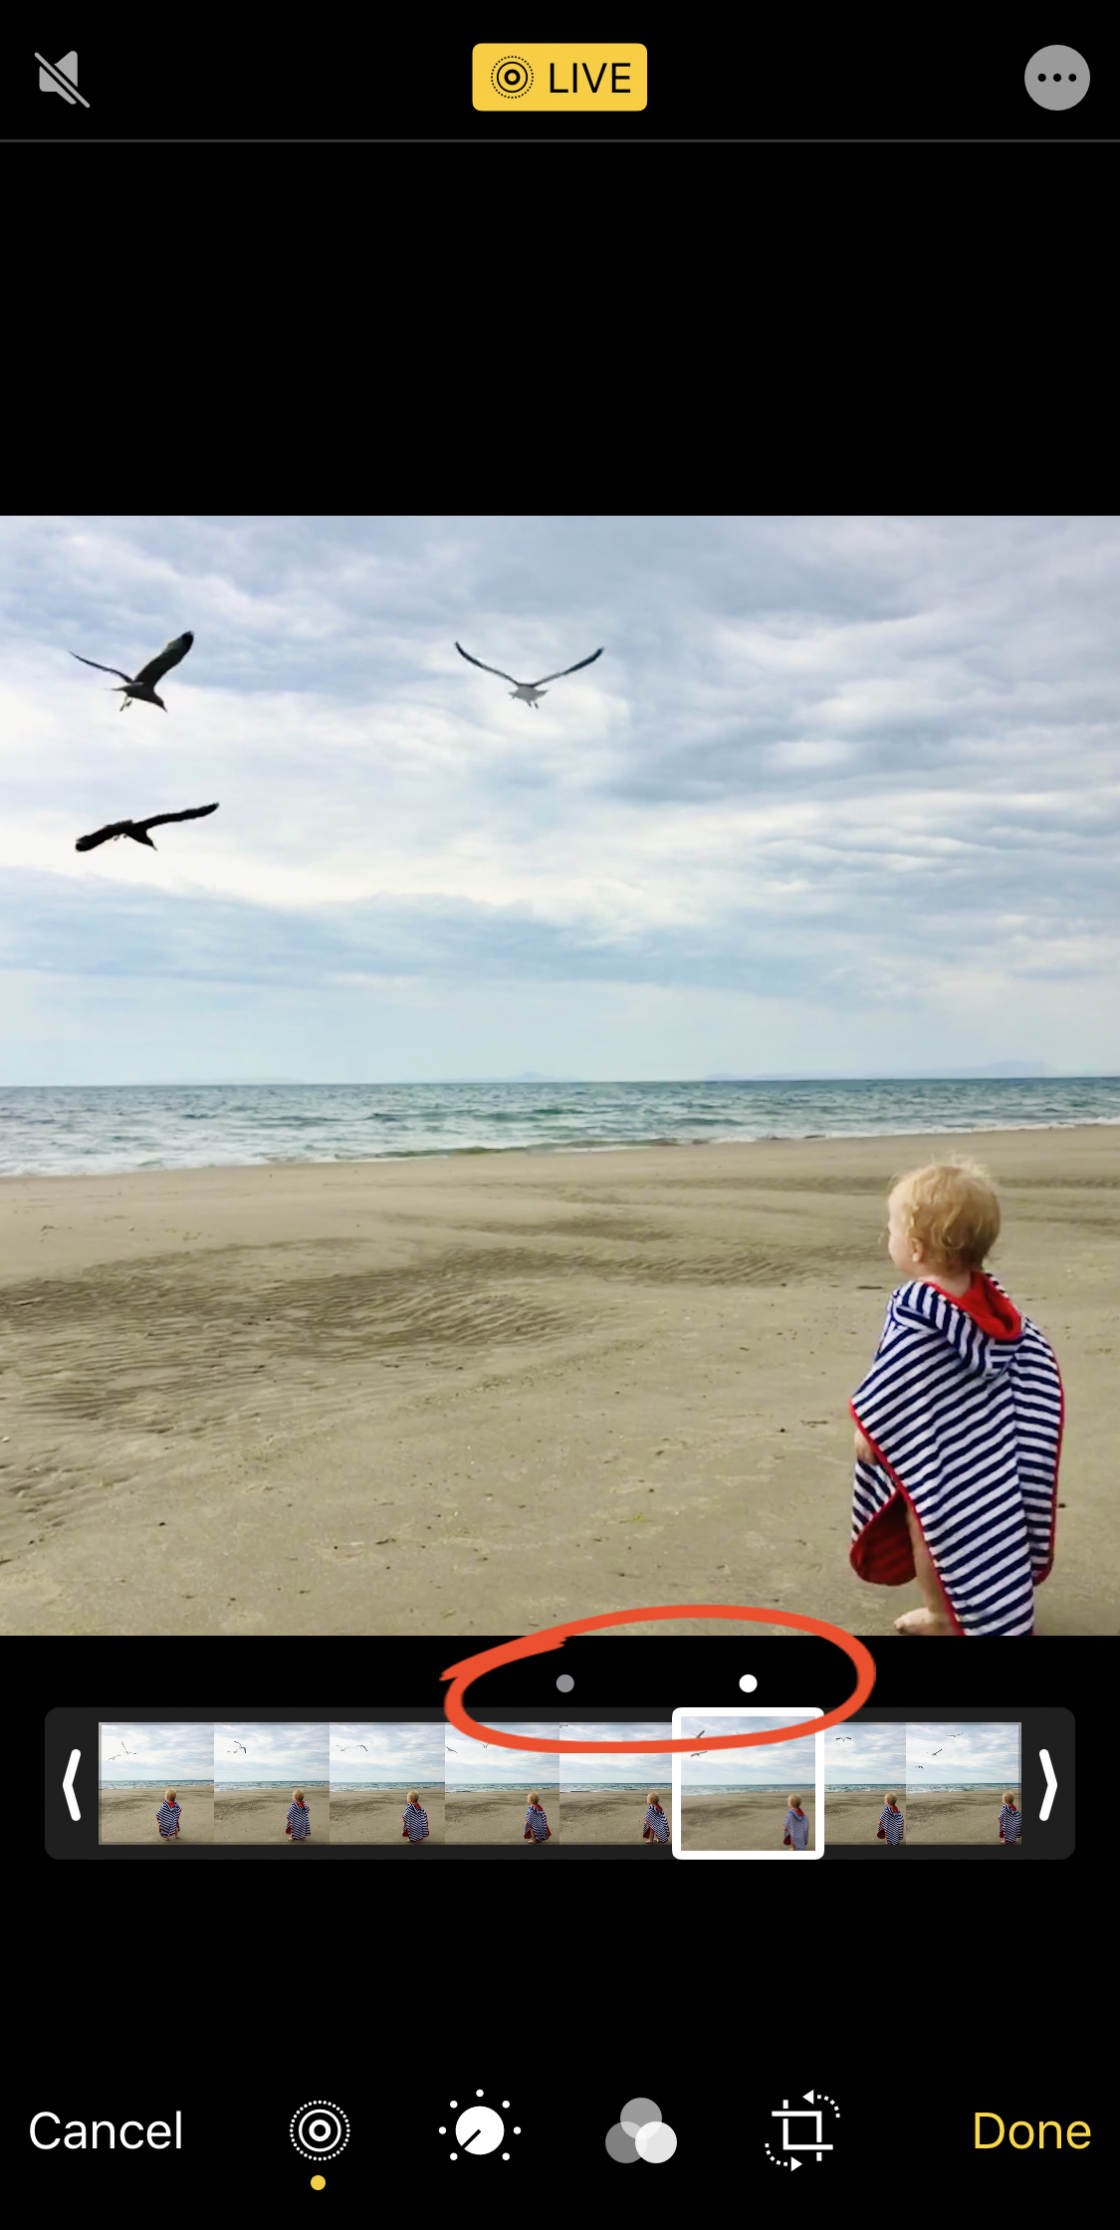
You can change the key photo (the one you see in your photo library) using the slider at the bottom of the screen. Move the slider until you find the image you want.
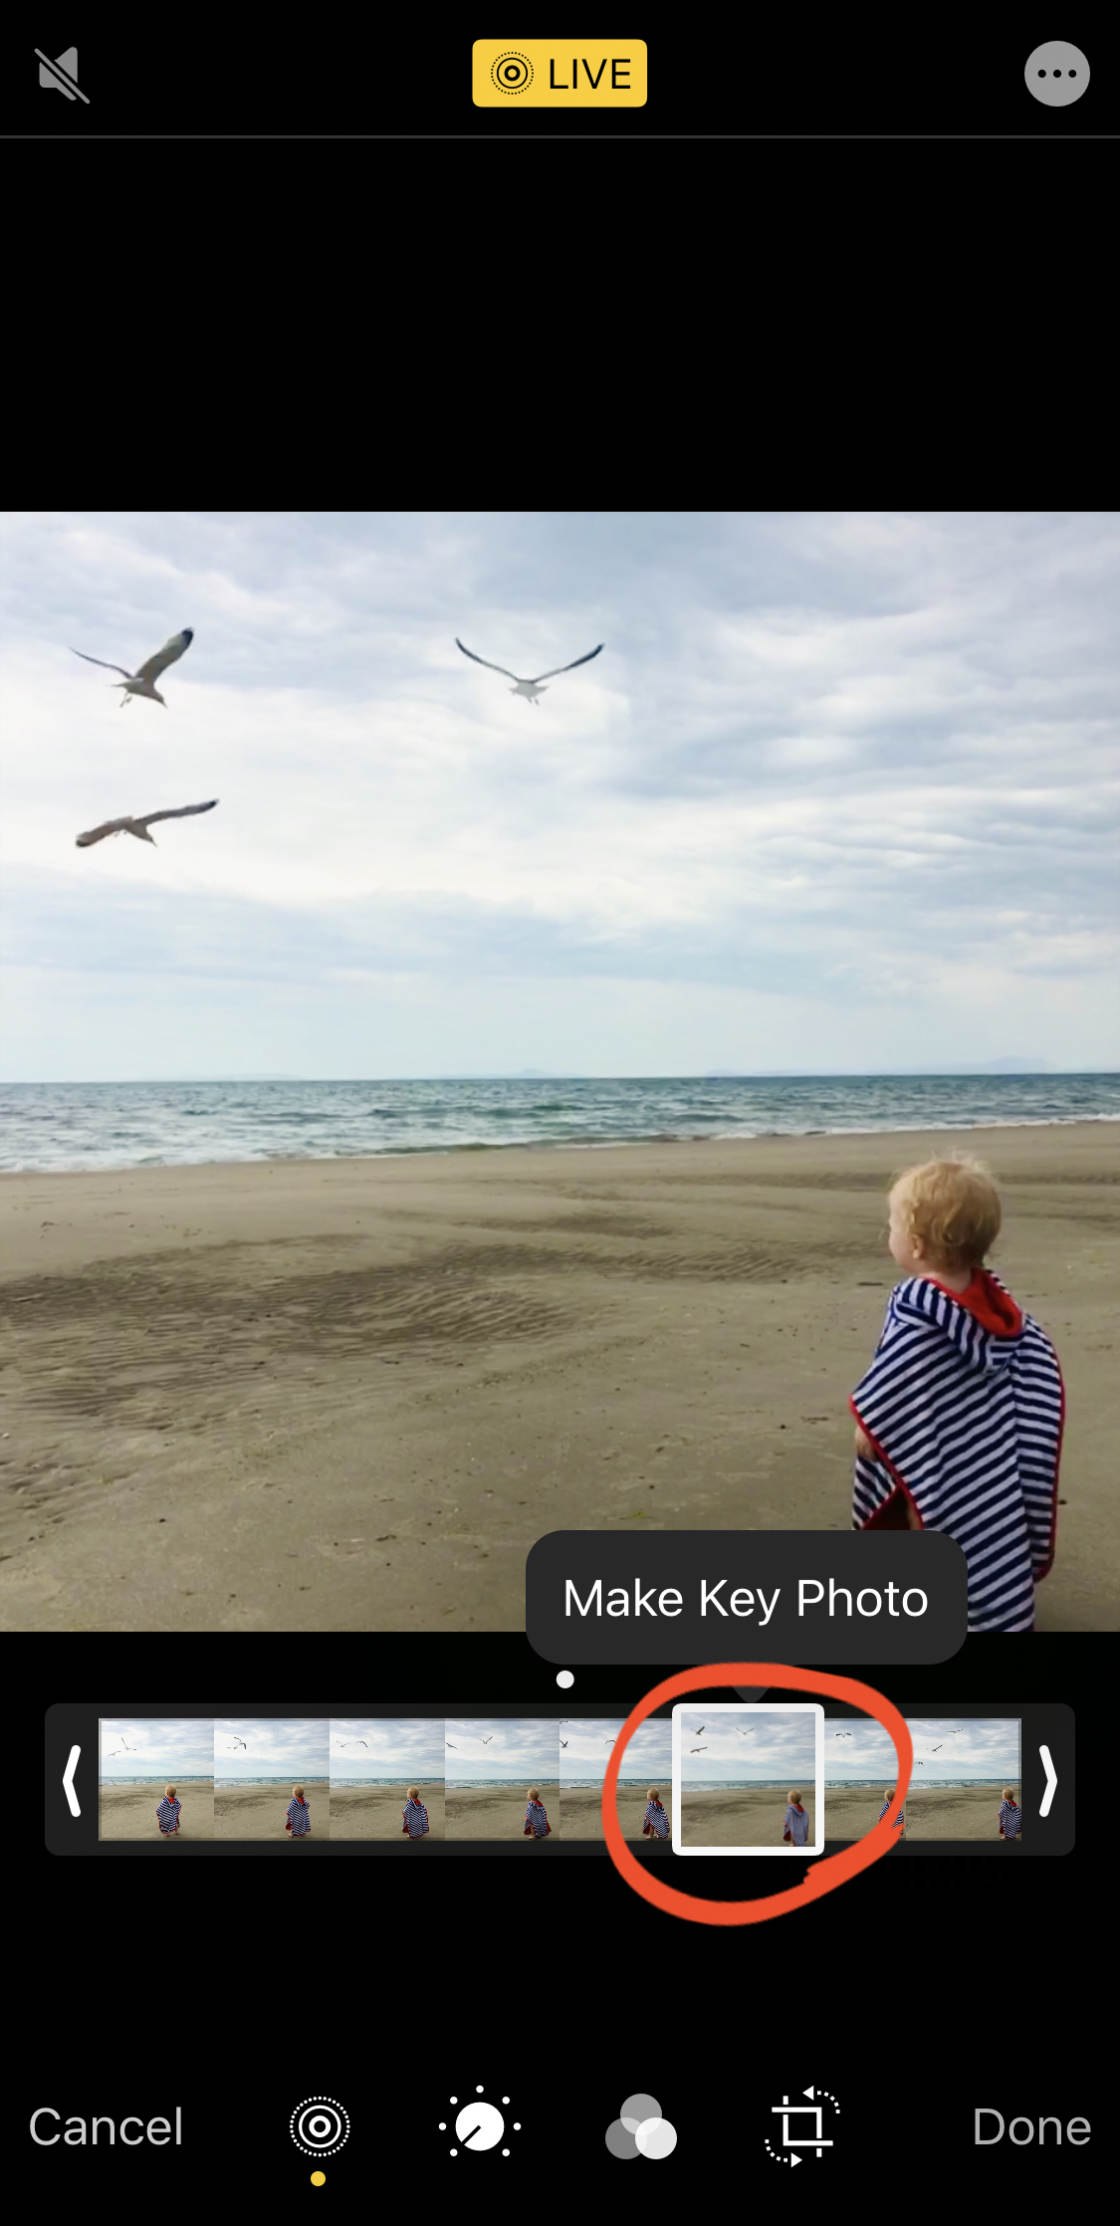
Tap Make Key Photo to confirm your choice.
A white dot will appear over your chosen photo. A grey dot appears over the original key photo in case you ever want to go back to it.
If you want to convert your Live Photo to a still image, tap the yellow Live icon at the top of the screen.

The icon will turn white to show that it's no longer a Live Photo. You can switch it back to a Live Photo at any time by tapping the Live icon again.
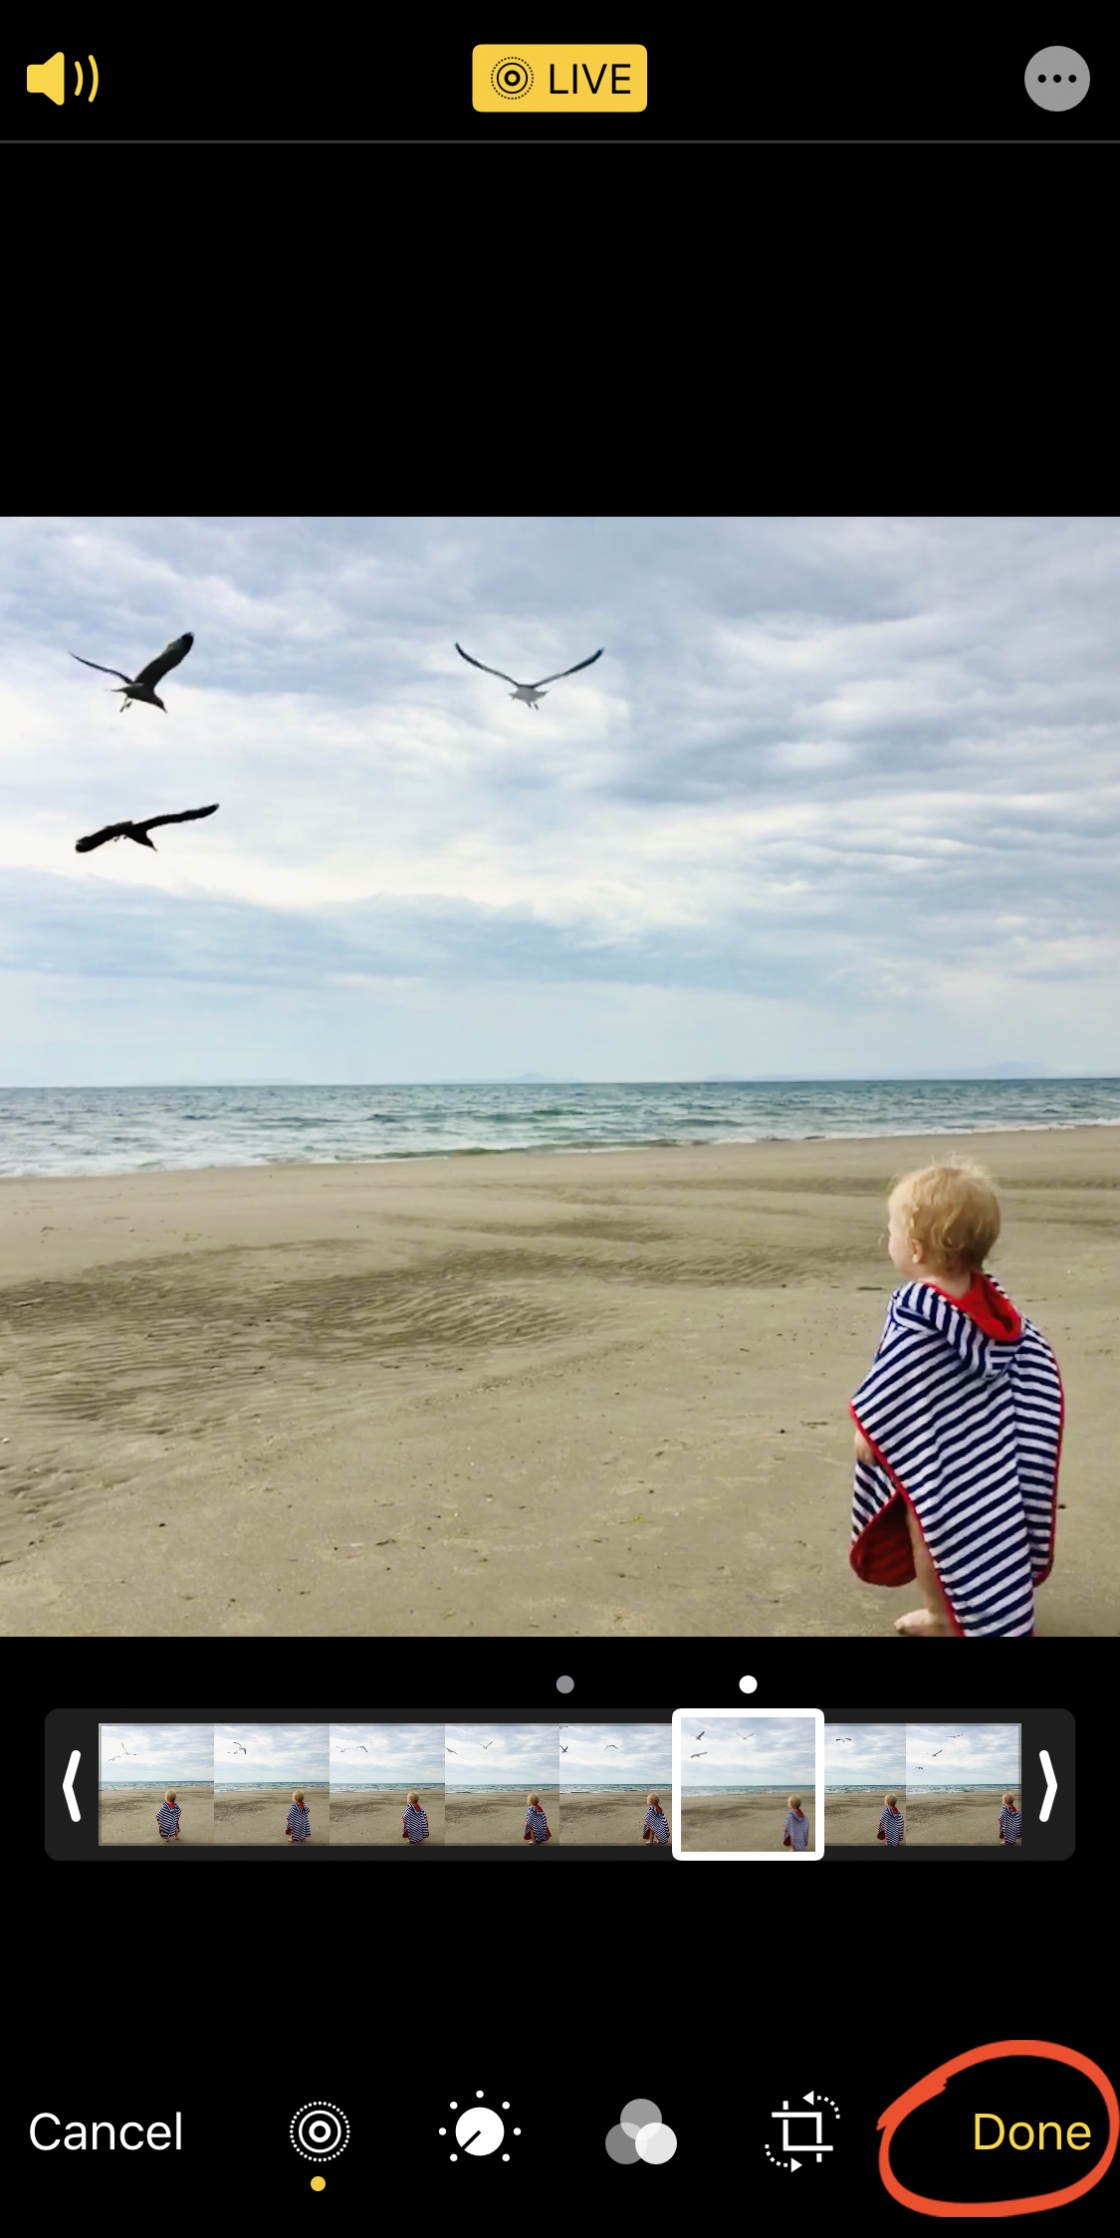
When you've finished editing your Live Photo, tap Done to save the changes.
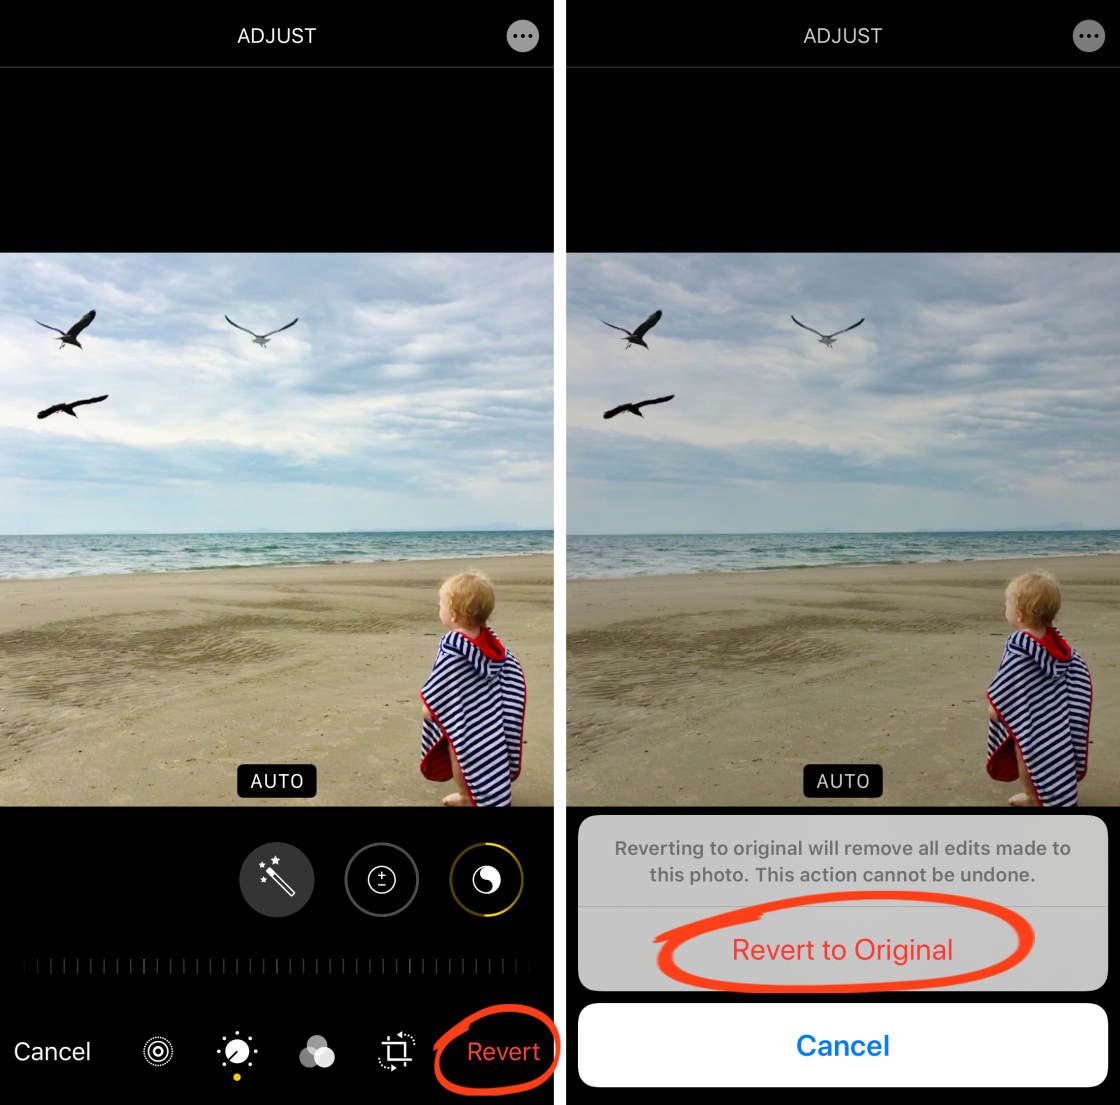
If you want to remove the editing you applied, you can revert back to the original Live Photo at any time.
In the Photos app, find the Live Photo you want to revert, and tap Edit.
Then tap Revert >Revert to Original.
4. How To Add Live Photo Effects
There are three special effects that you can apply to your Live Photos: Loop, Bounce, and Long Exposure.
To apply a Live Photo effect, go to the Photos app and open a Live Photo. Next, swipe up to reveal the Effects section:
Tap the effect you want to use (Loop, Bounce, or Long Exposure). The effect will apply to your Live Photo immediately.
You can change your mind at any time by tapping on a different effect. Or select Live to return to the original Live version with no effect applied.
Below you'll discover what the three effects look like. But first, here's our starting point – a basic Live Photo video with no effect applied:
4.1 Loop
The Loop effect turns your Live Photo into a continuous video loop. Once the video ends, it starts playing from the beginning again, until you stop it.
This works best where the subject is doing something in roughly the same area of the scene. For example, someone skipping, juggling, or dancing.
It can also work well if your subject enters and exits the scene during the original 3-second Live Photo. For example, someone getting out of a vehicle and leaving the scene. The end result could look like hundreds of people leaving the vehicle!
Below we've turned the waterfall Live Photo into a loop:
4.2 Bounce
Bounce is a fun effect that makes your Live Photo play as normal, and then in reverse. It repeats this until you stop the video.
The Bounce effect makes the waterfall below look rather unnatural. But it's definitely interesting!
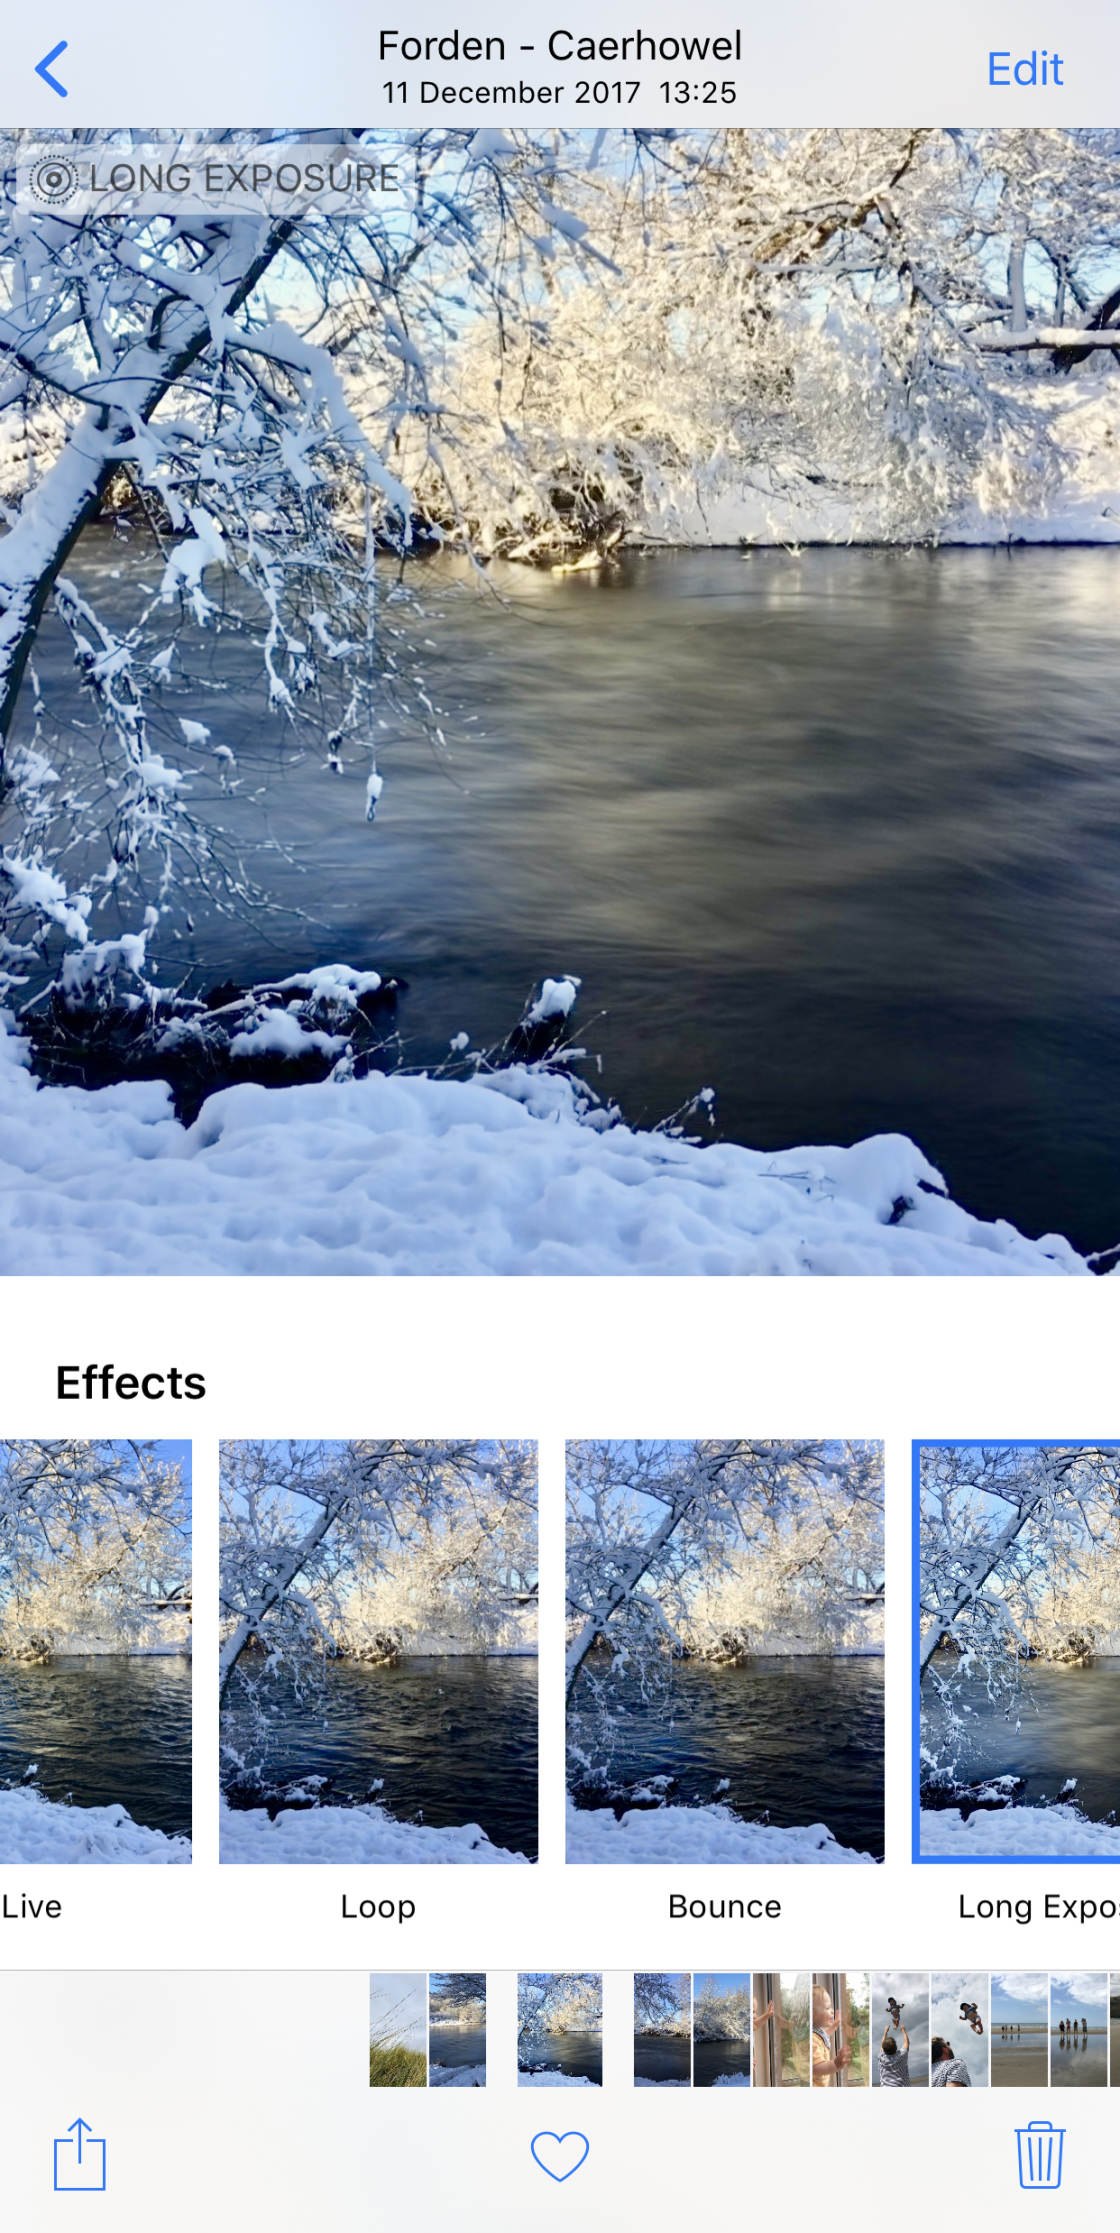
4.3 Long Exposure
The Long Exposure option creates a photo with a long exposure (slow shutter) effect.
Long exposure is most suited to scenes that include movement as it blurs the motion. Flowing water, firework,s or a moving car's lights look great with a long exposure effect.
If you think you'll want to create a long exposure from your Live Photo, it's best to use an iPhone tripod. This ensures that the stationary parts of the scene remain sharp in the final image.
The waterfall Live Photo below has had the Long Exposure effect applied. Notice the soft blur of the moving water, while the stationary objects such as the rocks appear sharp:

Once you've shot some great Live Photos on iPhone, you might want to share these moments with family and friends.
You can share Live Photos to another iPhone or iPad as long as it's running iOS 9 or later. You can use iMessage, AirDrop, or iCloud Photo Sharing.
To share a Live Photo, open it in the Photos app, then tap the Share icon.
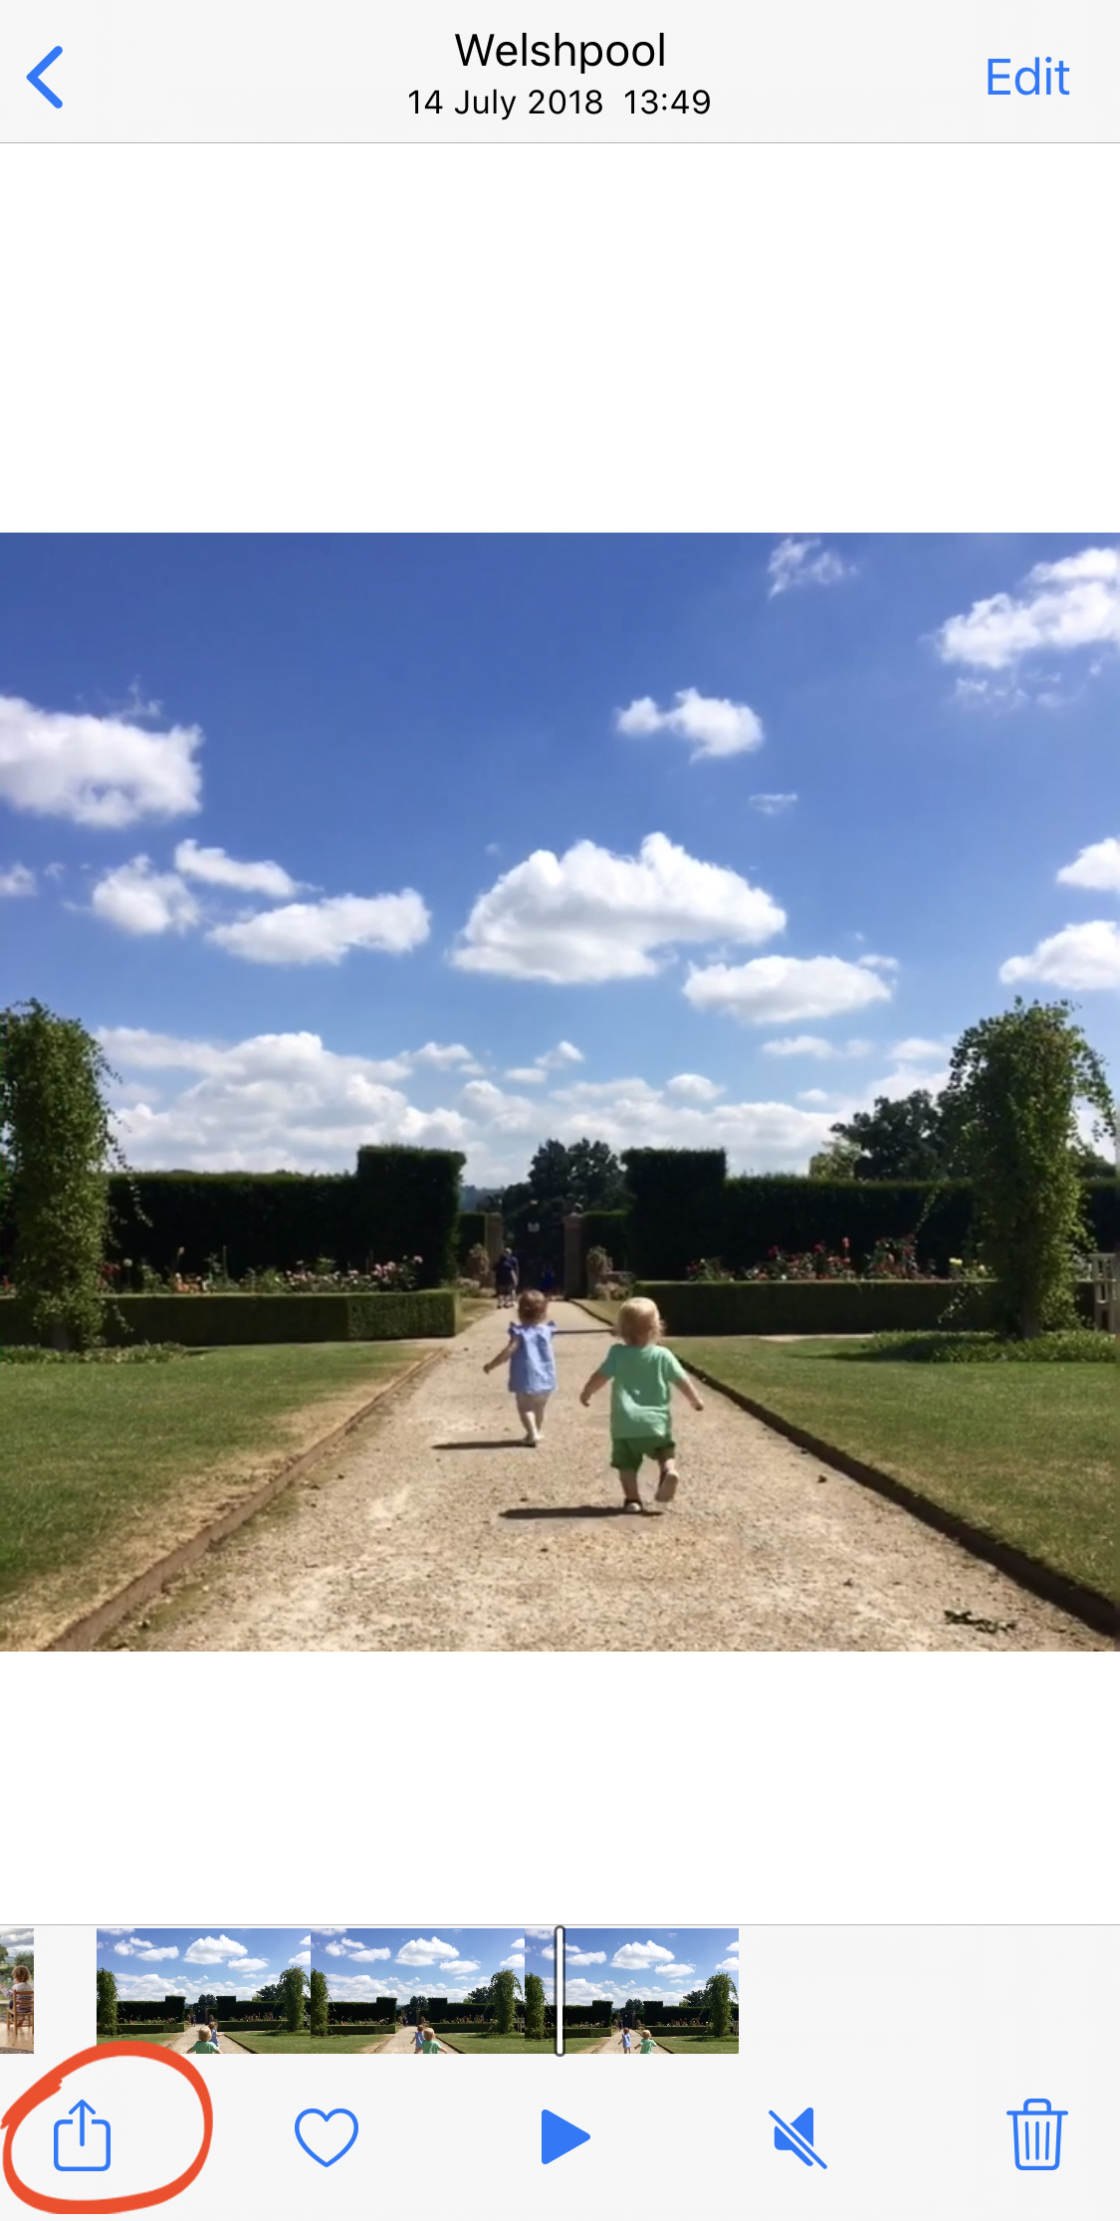
Next, select the sharing option that you want to use, e.g. Messages, Airdrop, etc.
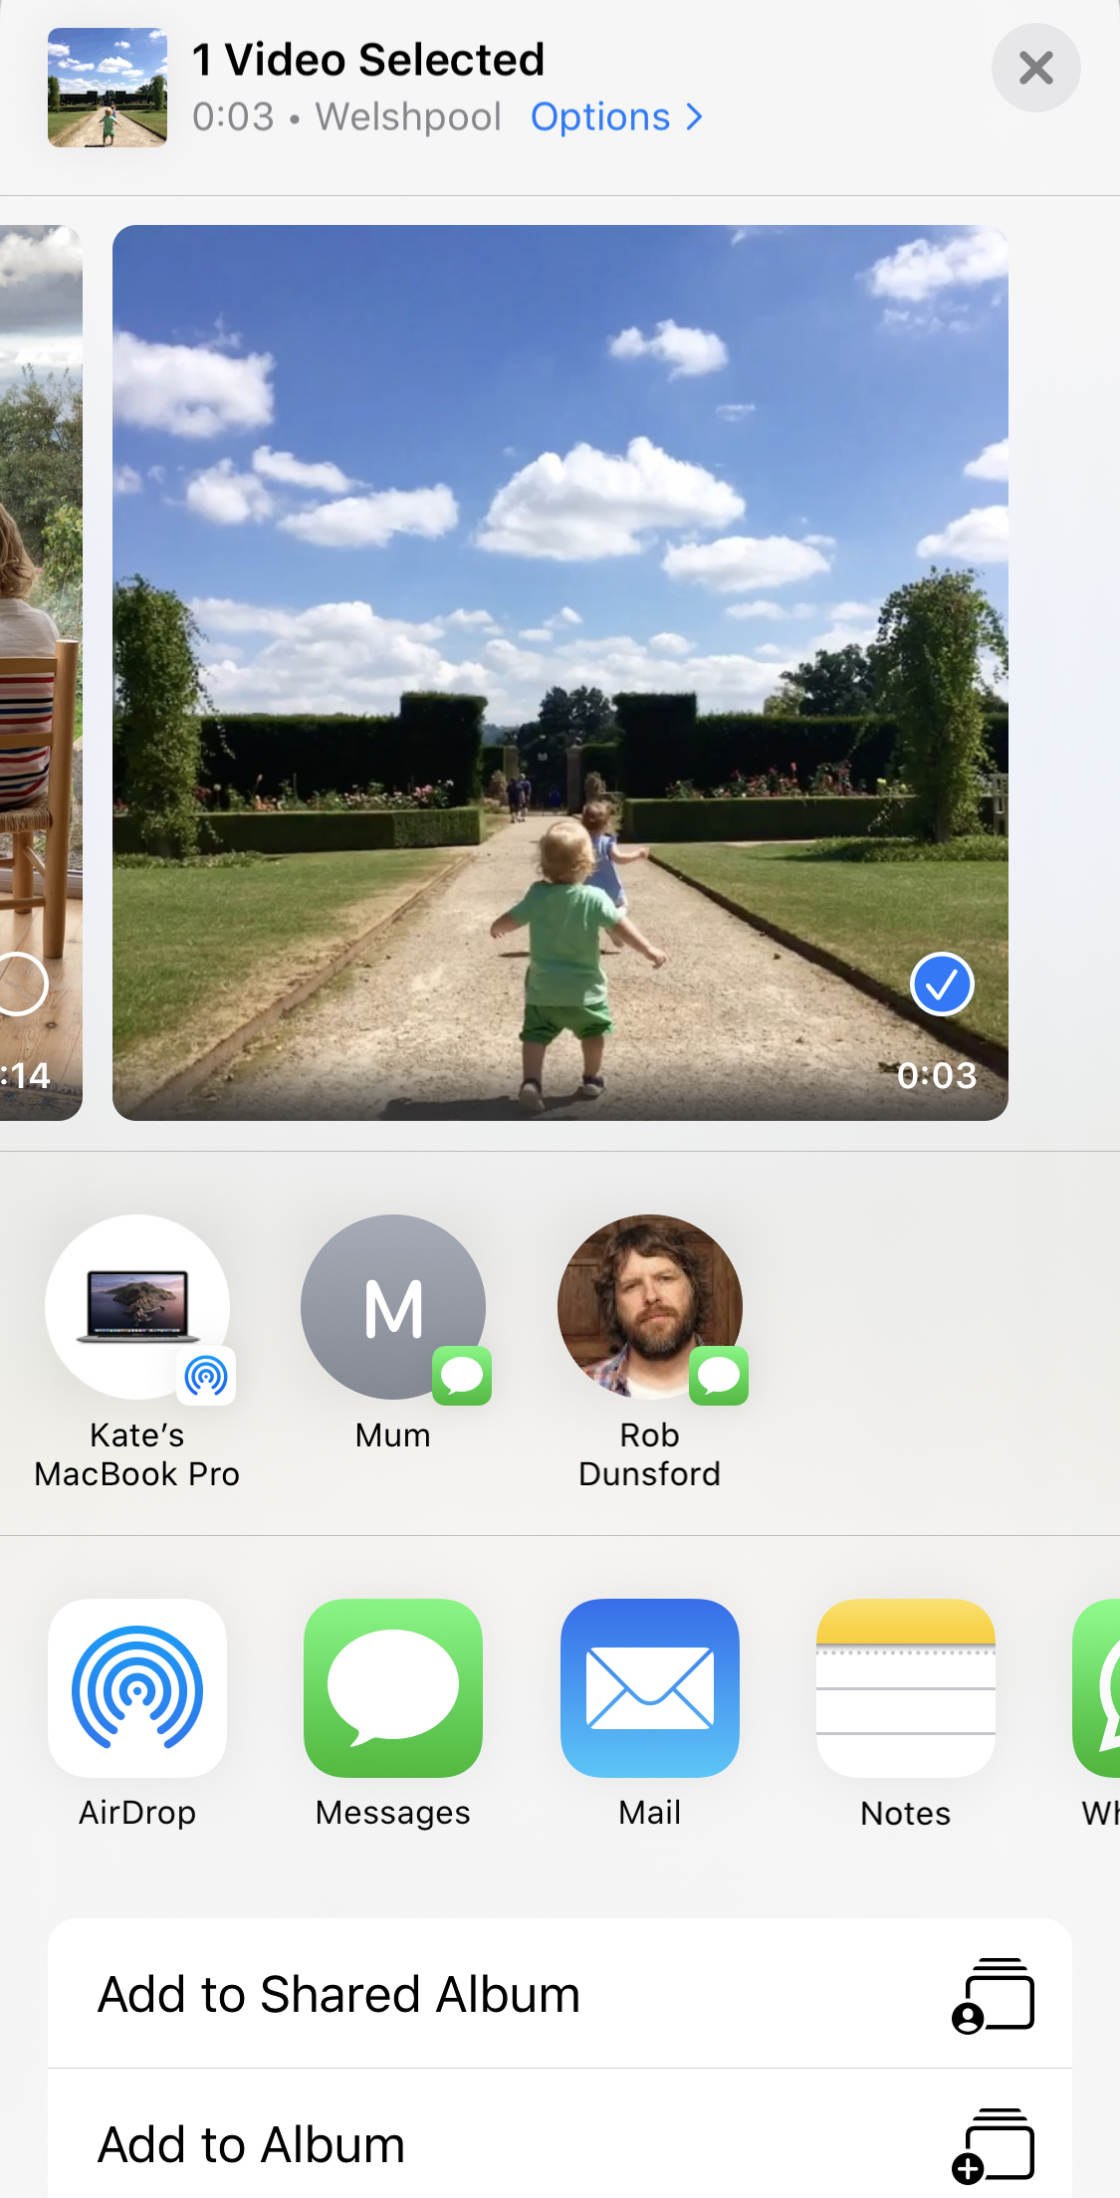
Note that you can't email a Live Photo. If you email it, the attachment will send as a still JPEG image.
6. How To Upload Live Photos To Facebook & Instagram
As well as sharing your Live Photos to other iPhones and iPads, you might want to share them on social media.
Facebook and Tumblr already allow you to share Live Pictures. More social media platforms are likely to support Live Photos at some point too.
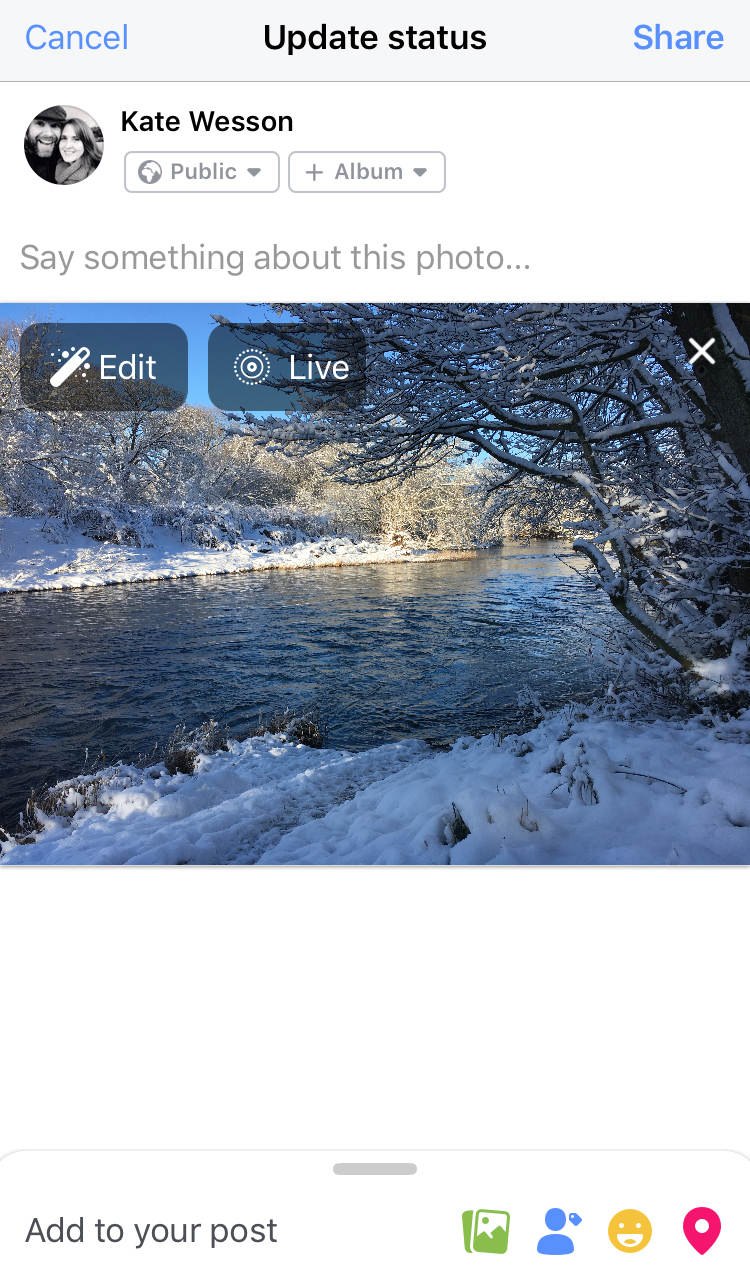
If you want to share a Live Photo on Facebook, you can't use the Facebook sharing option in the Photos app. Instead, you need to upload the photo from within your Facebook app.
From there, you can choose whether you want to share it as a Live Photo or a still image. Use the Live icon at the top of the photo to switch it on or off:
Instagram doesn't yet support the use of Live Photos. But you can use a third-party app such as Lively (free to download from App Store) to convert a Live Photo to video. You can then upload the video to Instagram.
Here's how to save a Live Photo as video:
Open the Live Photo in the Lively app, then select Movie at the top of the screen. Tap Export Movie, then tap the Save icon. This saves the Live Photo as an ordinary video file in your photo library:
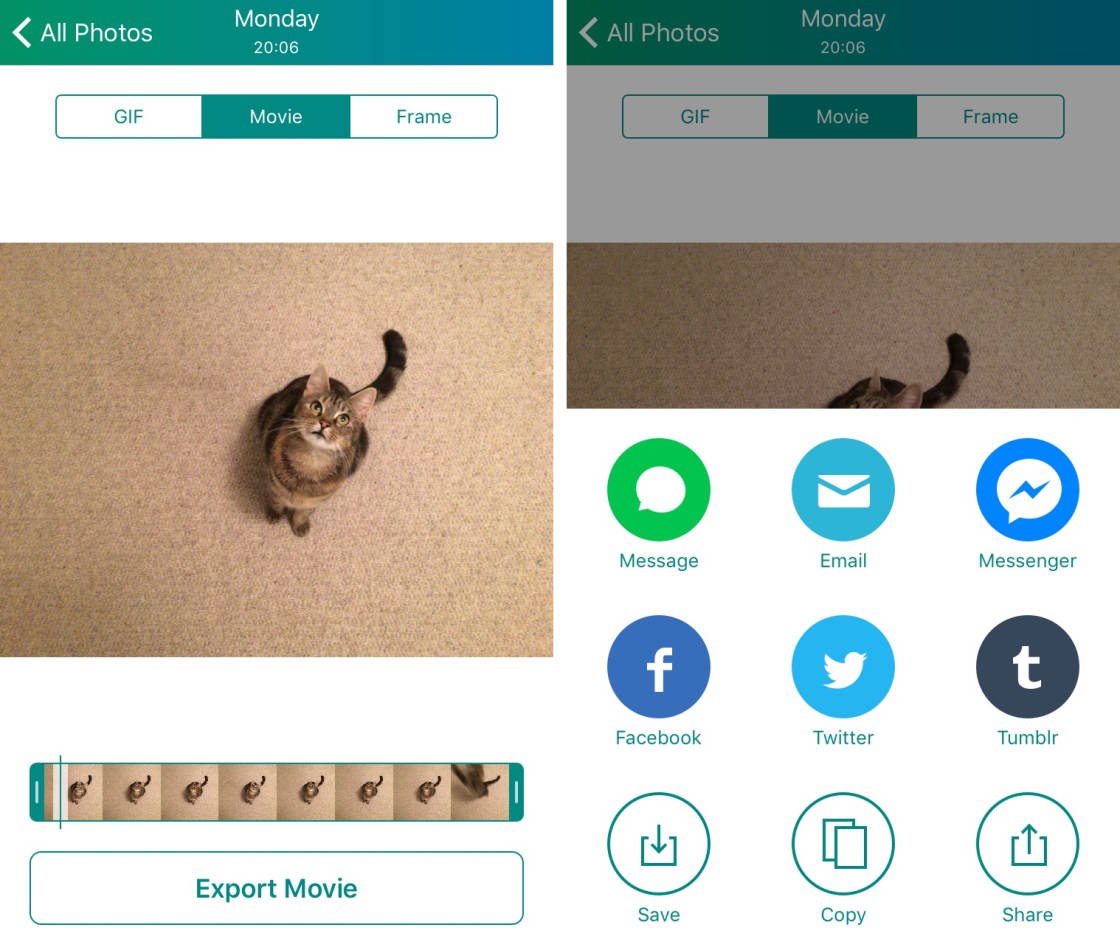
You can then open the Instagram app and upload the video from your library.
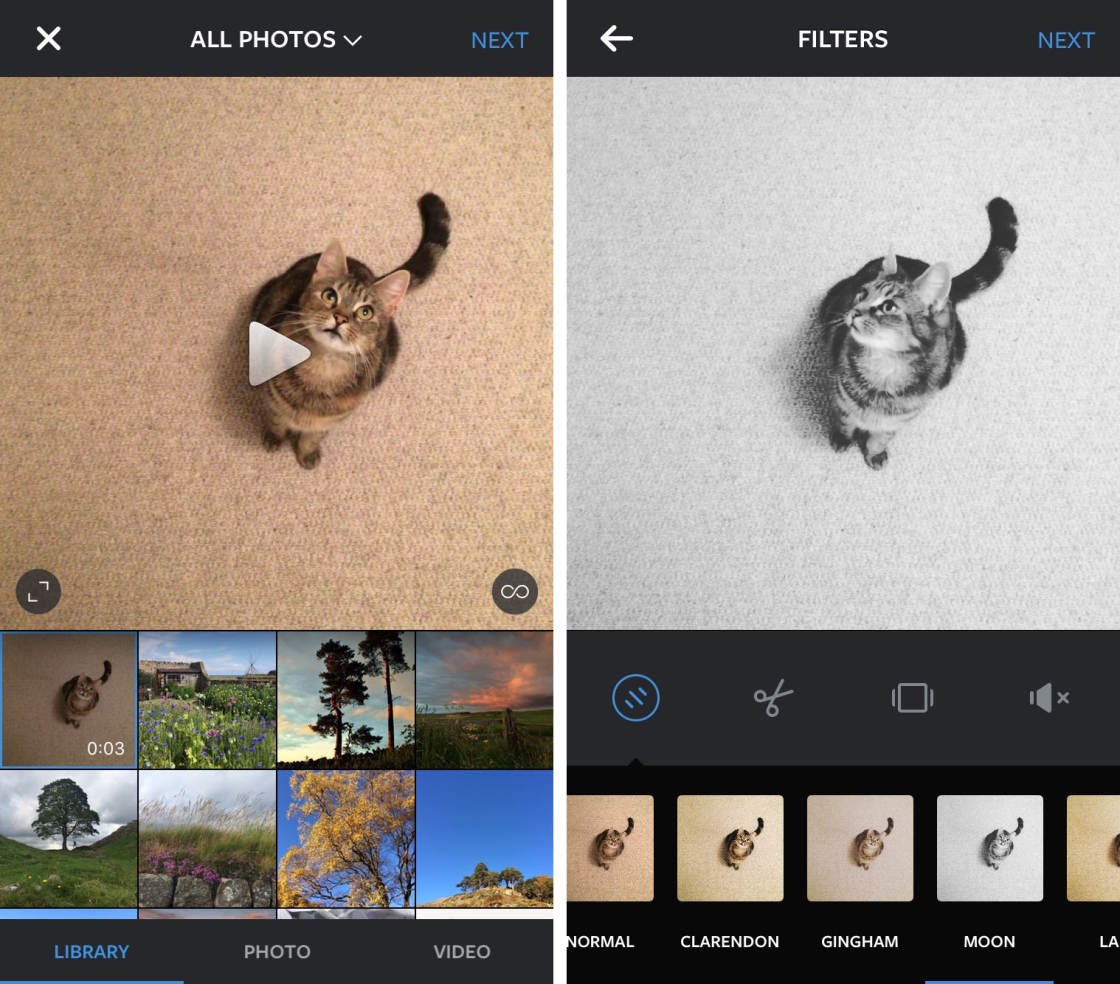
Before posting to Instagram, you can use the filters and editing tools to enhance your Live Photo.
7. When To Use iPhone Live Photos For The Best Results
A Live Photo offers so much more than an ordinary still image.
The iPhone Live Photo feature is perfect for capturing any scene with moving subjects or interesting sounds.
A Live Photo will capture all those extra little details that you can't convey in a still image.
Crashing waves, a river or waterfall, trees swaying in the wind, or a busy street scene all make great Live Pictures.
It's also fantastic for scenes where the sound would add an extra sensory element to the image. For example, birdsong or the sound of water when you're shooting out in nature.
Live Photos also works well when photographing people – especially children. It allows you to capture those fun "out-take" moments before and after you take the photo.
Without Live Photos, you wouldn't be able to preserve these special little moments.
How To Edit Live Photos On Iphone 6s
Source: https://iphonephotographyschool.com/live-photos/
Posted by: ridingerfirwass.blogspot.com
0 Response to "How To Edit Live Photos On Iphone 6s"
Post a Comment